3D Wood Wall Panels Installation: The 2026 Guide to Professional Results
What if the only thing standing between your Orlando living room and a high-end architectural masterpiece is a single miscalculated cut? You’ve likely spent hours admiring those deep-textured, fluted oak walls and imagining how they’d revitalize your home. But when you’re staring at a stack of expensive panels, the pressure to achieve perfection is real. You’re probably worried about damaging the wood during a complex trim or wondering how our local Florida humidity will affect the expansion of those geometric patterns over time.
We understand that a luxury feature wall is an investment in your environment’s psychological and aesthetic value. You can master the art of 3D wood wall panels installation with our comprehensive guide to preparation, precision layout, and professional finishing techniques. We’ll show you how to navigate the choice between adhesive and mechanical fastening while ensuring every seam looks intentional and seamless. This 2026 guide provides the confidence you need to tackle the project or identify when a complex layout requires the specialized touch of a professional craftsman.
Key Takeaways
- Identify the best materials for 2026, including walnut, oak, and sustainable MDF, to match your aesthetic and durability needs.
- Learn the “Precision First” philosophy for wall preparation to ensure a perfectly flat surface before you begin your project.
- Master the 3D wood wall panels installation process using dry-fit techniques and center-out layouts for a seamless, continuous pattern.
- Discover how professional finishing techniques like color-matched putty and strategic lighting can elevate a DIY look to a luxury architectural feature.
- Recognize when complex geometric layouts require the specialized precision and humidity-management expertise of a local Orlando craftsman.
Understanding 3D Wood Wall Panels: Aesthetics and Materials
3D wood wall panels are sophisticated architectural elements designed to manipulate light and shadow. While the history of wood panelling dates back centuries as a way to insulate and protect walls, the 2026 approach is purely about depth and texture. A professional 3D wood wall panels installation transforms a room into a tactile experience, creating a dynamic focal point that shifts as the sun moves across your room. Unlike traditional shiplap or flat wainscoting, which rely on simple linear patterns, 3D panels introduce a third dimension that breathes life into static surfaces.
For 2026, we see a massive shift toward natural walnut and oak, alongside high-performance sustainable MDF composites and reclaimed timber. These materials offer a psychological anchor in our fast-paced world, grounding modern Orlando interiors with the warmth of biophilic design. Integrating natural textures into your home isn’t just about looks. It’s about the psychological benefit of creating a sanctuary that feels restorative and connected to the natural world. It brings a sense of calm and sophistication that flat paint simply cannot replicate.
Popular 3D Styles: From Slat Walls to Geometric Blocks
Vertical slat walls, often called fluted panels, remain a top choice for those wanting to add height and a contemporary rhythm to their space. If you prefer something more daring, geometric block patterns turn a standard living room into an art gallery. These blocks vary in thickness to create a rugged, staggered landscape on your wall. For a softer touch, textured wave panels mimic organic movement, casting gentle shadows that evoke the feeling of water or wind-swept sand. Each style offers a different emotional weight, from the structured order of slats to the creative energy of geometric blocks. To see how these textures can be integrated into broader home design, you can find out more about bespoke fitted furniture that elevates your interior aesthetic.
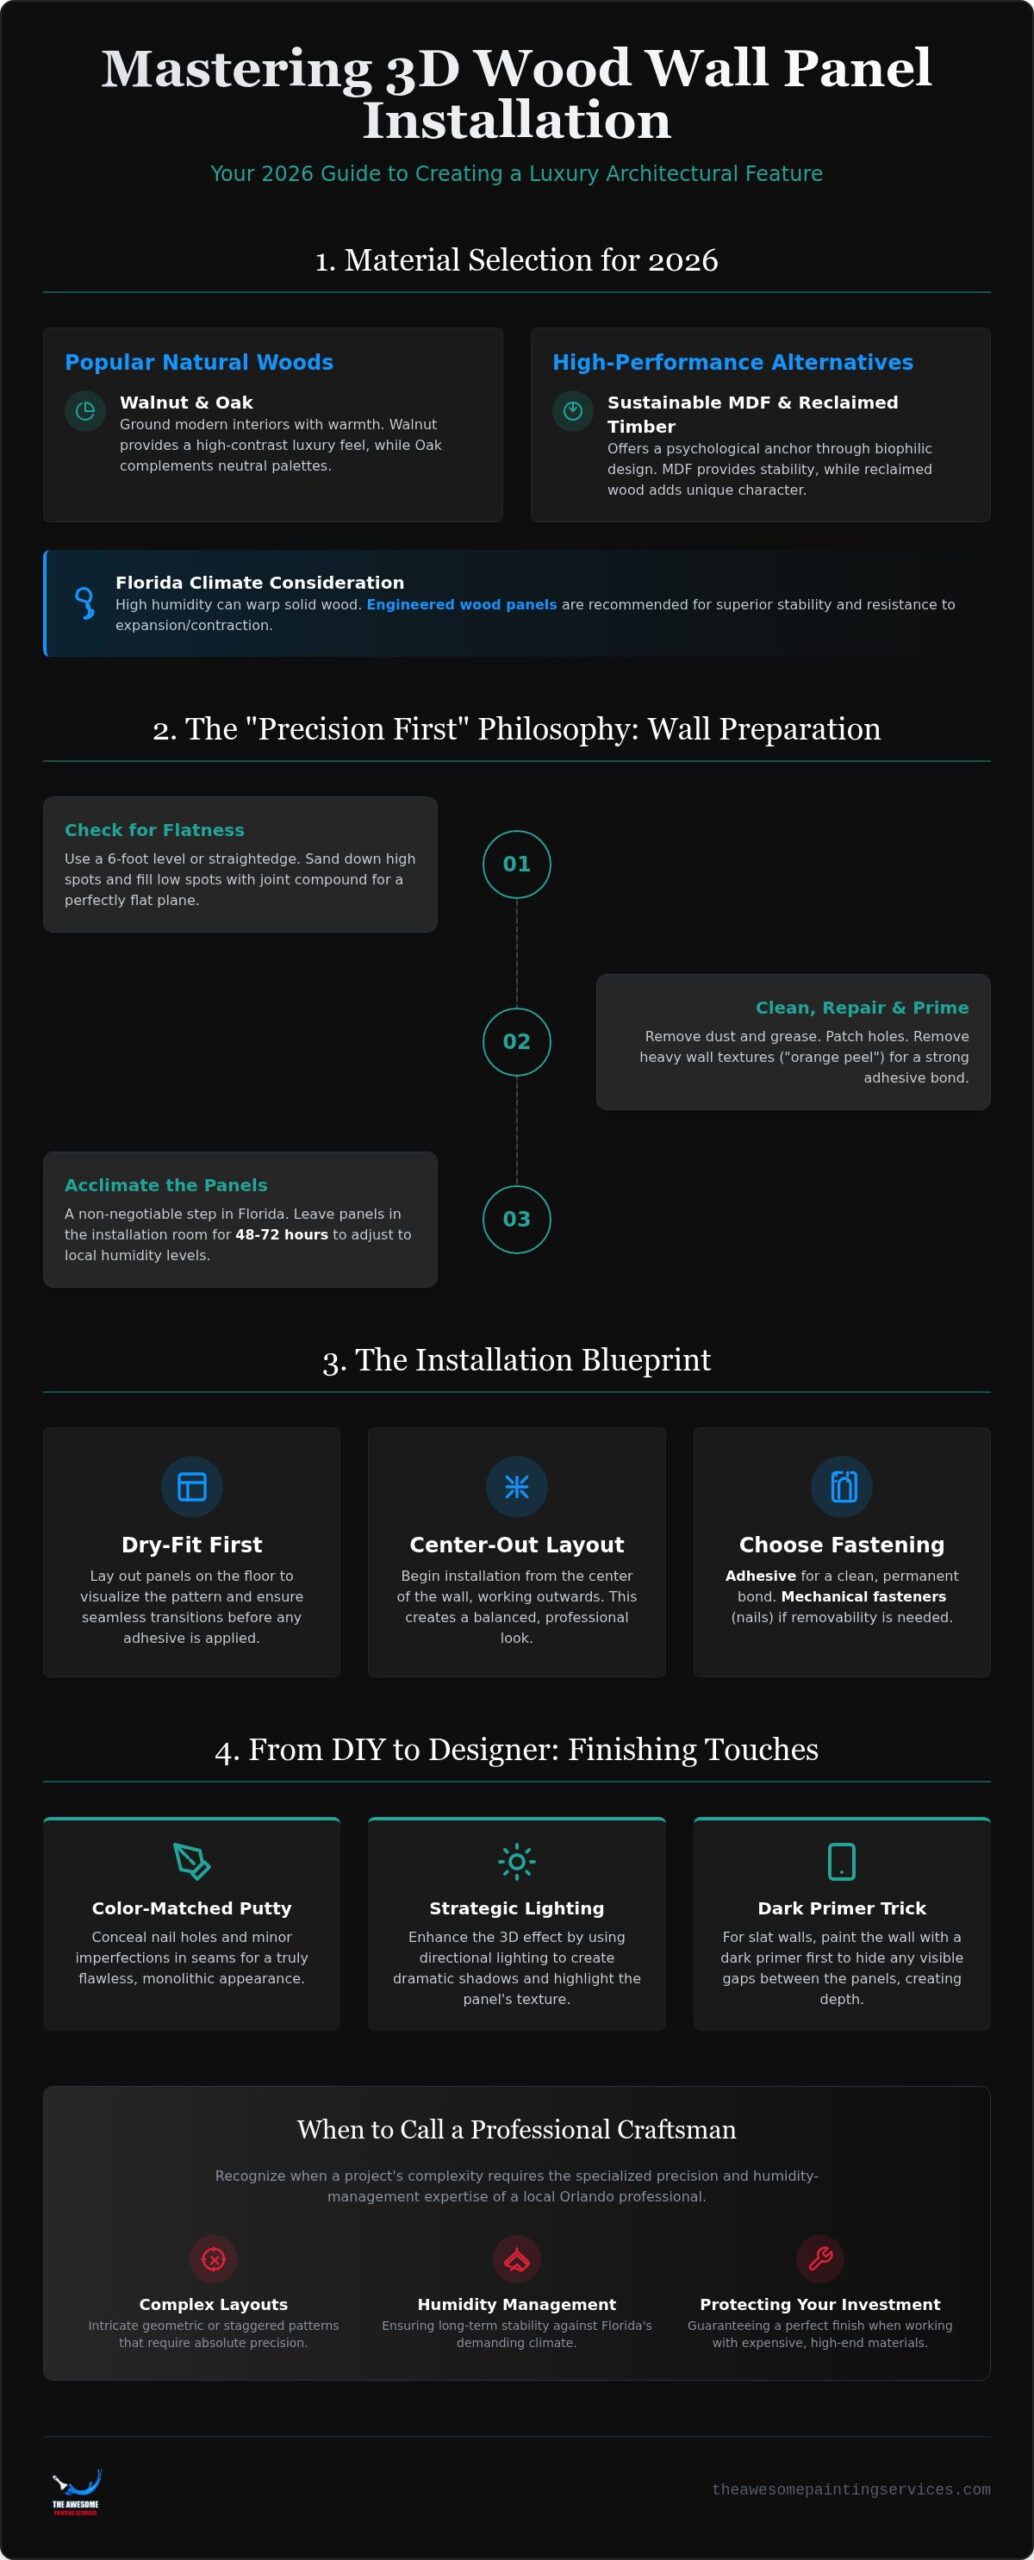
The success of your 3D wood wall panels installation depends heavily on selecting materials that can handle Central Florida’s unique environment. High humidity in areas like Kissimmee and Windermere can cause solid hardwoods to expand and contract aggressively. This makes acclimation a non-negotiable step in the process. We often recommend engineered wood panels for their superior stability in varying indoor temperatures. They offer the same aesthetic beauty as solid wood but with a core designed to resist warping.
When planning your feature wall, consider how the wood grain and stain will interact with your existing interior painting Orlando. A dark walnut panel against a crisp, light-colored wall creates a high-contrast luxury feel, while lighter oak slats can complement a warmer, neutral palette. Our goal is always to ensure the new installation feels like a seamless extension of your home’s original vision, maintaining a balance between the bold texture of the wood and the refined finish of your walls.
Preparing Your Walls for a Flawless Installation
A professional 3D wood wall panels installation isn’t just about the wood you see on the surface; it starts with the substrate underneath. Our “Precision First” philosophy dictates that the final result is only as good as the wall it rests upon. If your wall is uneven, your panels will eventually shift, gap, or fail to align. Use a six-foot level or a reliable straightedge to check for flatness across the entire installation area. High spots must be sanded down, and low spots should be filled with joint compound to create a perfectly flat plane before you begin.
Cleaning and priming are equally critical steps that many homeowners overlook. Dust, grease, or old paint can prevent adhesive from bonding correctly, leading to panels that pull away over time. Adhering to building code requirements for wood ensures your installation is structurally sound and safe for your home environment. Before any material touches the wall, ensure the surface is dry and free of debris. In Central Florida, proper wood acclimation requires leaving your panels in the installation room for 48-72 hours to adjust to the natural humidity levels of your home.
Surface Preparation and Repair
Many homes in Orlando and Winter Park feature heavy “orange peel” or “knockdown” drywall textures. You must remove these textures or peeling paint to ensure a strong, permanent bond for your adhesive. Patch any existing holes and sand the surface smooth to prevent air pockets behind the wood. If you are installing vertical slat walls, consider applying a dark primer to the wall first. This clever trick hides the wall color in the tiny gaps between panels, creating a deeper and more professional shadow effect that enhances the 3D quality.
The Essential Tool Kit for 3D Installation
Accuracy is the difference between a DIY project and a high-end architectural feature. While traditional spirit levels work for small areas, a laser level provides the absolute horizontal and vertical precision needed for complex, wall-to-wall layouts. For cutting, a miter saw equipped with a high-tooth-count finishing blade is non-negotiable. It prevents ugly splintering and ensures every edge is crisp and professional. When it comes to fastening, select a high-quality construction adhesive specifically rated for wood-to-drywall bonds. Pair this with 18-gauge brad nails to hold the panels securely in place while the glue sets. This dual-fastening method is especially important in Orlando, where shifting humidity can put stress on standard adhesives. If you are unsure about your wall’s structural readiness, consulting with a local custom carpentry expert can save you from costly mistakes later.
Step-by-Step 3D Wood Wall Panels Installation Guide
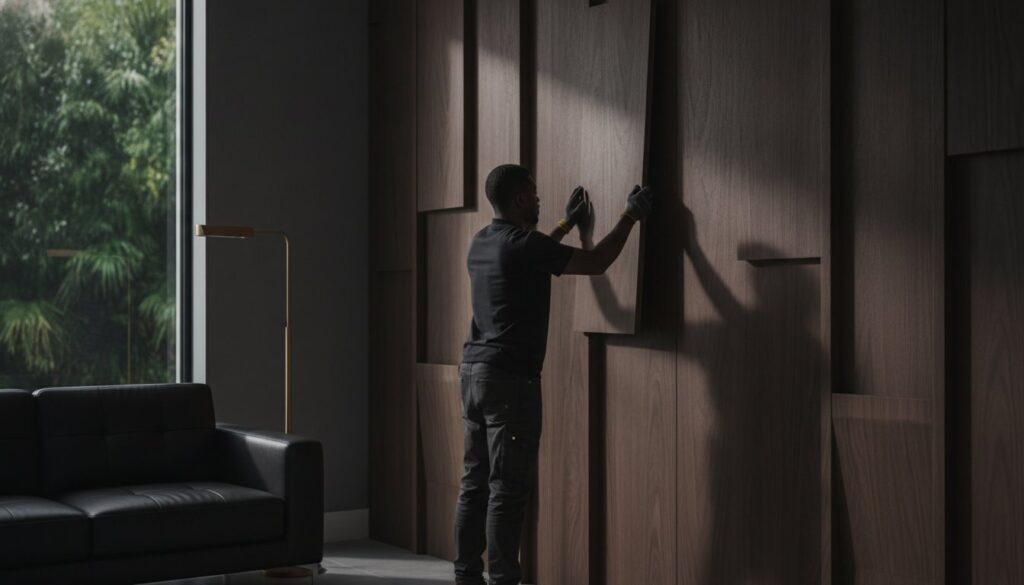
Your layout strategy determines the visual balance of the entire room. For most 3D wood wall panels installation projects, we recommend a “Center-Out” approach. This involves finding the exact midpoint of your wall and working toward the edges. It ensures that any cut panels at the corners are equal in size, creating a professional, symmetrical look. Alternatively, a “Corner-to-Corner” strategy works best if one side of the wall is permanently obscured by large furniture or a perpendicular wall. Before you apply any adhesive, perform a “Dry Fit” by laying your panels out on the floor. This allows you to check for pattern continuity and ensures the wood grain flows naturally from one piece to the next without jarring interruptions.
When you’re ready to mount, apply your construction adhesive in a continuous “snake” pattern rather than large dots. This technique provides superior surface coverage and prevents air pockets that can cause panels to vibrate or pull away over time. The first row is your foundation. If it’s even slightly off-level, the error will compound as you move up the wall. Take your time here. Use your laser level to verify the alignment before the adhesive begins to set. This first row dictates the success of the entire 3D wood wall panels installation.
Measuring and Cutting for a Perfect Fit
Precision is your best friend when working around obstacles. To measure for electrical outlets or light switches, create a cardboard template of the outlet size and transfer those dimensions to the back of the panel. When cutting 3D textures, apply painter’s tape over your cut line to prevent the wood face from splintering. Many older homes in Winter Park feature walls that aren’t perfectly square. In these cases, you’ll need to “scribe” the end panels. This involves trimming the edge of the panel at a slight angle to follow the unique contour of your corner, ensuring a tight, gap-free fit against the adjacent wall.
Securing the Panels: Adhesive and Mechanical Fastening
A permanent bond requires both chemistry and mechanics. Use a high-tack construction adhesive specifically formulated to withstand the internal shifts caused by Florida’s humidity. While the glue provides long-term strength, 18-gauge brad nails act as your temporary clamps. Fire these nails into the “valleys” or deeper recessed areas of the 3D pattern. This makes the tiny holes nearly invisible to the naked eye. Don’t assume your panels are staying true as you progress. Perform a level check after every three panels to prevent “drift.” Even a one-millimeter gap can grow into a noticeable flaw by the time you reach the ceiling, so constant vigilance is the hallmark of a professional result.
Finishing Touches: Staining, Painting, and Lighting
The finish you choose is the final step in your 3D wood wall panels installation, and it’s often the most rewarding. This is where you transform raw materials into a luxury statement. While many DIYers stop once the last panel is nailed, a professional geometric accent wall installation relies on meticulous finishing to hide the mechanics of the build. Start by filling every brad nail hole with color-matched wood putty. Standard wood filler often dries to a different shade, so test your putty on a scrap piece first. Once it’s dry, sand it flush with a fine-grit block to ensure the surface is perfectly continuous.
Choosing between natural stains and bold paint colors depends on the mood you want to create. Natural stains like walnut or oak celebrate the wood’s organic character and grain patterns. They bring a sense of warmth and timelessness to your home. On the other hand, bold paint colors like charcoal, navy, or even deep forest green can turn a textured wall into a modern, high-contrast focal point. Whatever you choose, the finish must be applied evenly to avoid drips that can settle in the valleys of the 3D pattern. Precision at this stage ensures the shadows look intentional and crisp.
Professional Painting and Staining Techniques
To achieve a true “factory finish” on complex 3D surfaces during your 3D wood wall panels installation, we recommend using HVLP (High Volume Low Pressure) sprayers. Brushes and rollers often struggle to reach the deep recesses of a fluted or geometric panel without leaving unsightly globs of paint. A sprayer provides a fine, misted coat that preserves the sharp edges of the wood. In high-traffic areas like hallways or kitchens, always apply a high-durability topcoat. This protects the wood from scuffs and makes it easier to clean without damaging the finish. Your accent wall should complement your existing room palette, acting as a sophisticated anchor rather than a competing element.
Integrating Lighting for Maximum 3D Impact
Lighting is the secret ingredient that brings your 3D wall to life. Without directional light, the texture can look flat and uninspired. Installing LED strip lighting along the top or bottom edge of the wall creates dramatic grazing shadows that emphasize the depth of the panels. Wall sconces are another excellent option. They highlight the peaks and valleys of the wood texture, creating a warm, inviting glow in the evening. Be careful not to use flat, overhead lighting that washes out the effect. If you want to ensure your feature wall looks its absolute best, contact The Awesome Painting Services for a professional finishing consultation today.
The Professional Advantage: Custom Carpentry in Orlando
While a 3D wood wall panels installation can be a rewarding weekend project, the leap from pre-fabricated panels to a truly bespoke geometric feature requires a different level of mastery. Custom carpentry isn’t just about sticking wood to a wall; it’s about understanding the architectural soul of your home. Complex geometric layouts demand mathematical precision and a deep understanding of wood grain behavior. One slight miscalculation in your cutting sequence can throw off an entire wall’s symmetry, leading to wasted materials and frustration. Our team brings the “Reliable Visionary” approach to every project, ensuring your vision is executed with a level of precision that standard DIY tools simply can’t match.
In Central Florida, professional execution is your best defense against the elements. Our local expertise allows us to manage the unique expansion and contraction challenges posed by Orlando’s humidity. We don’t just install; we engineer each wall for long-term durability. By using high-durability coatings and specialized fastening techniques, we ensure your investment remains as crisp and vibrant as the day it was finished. You’ll save hours of labor and avoid the inevitable “DIY headache” that comes with troubleshooting complex trim work and integrated lighting. We handle the heavy lifting so you can focus on the psychological benefits of your refreshed environment.
Bespoke Geometric Designs for Central Florida Homes
We move beyond the limitations of store-bought panels to offer custom-cut geometric wood patterns tailored specifically to your space. From the modern estates of Windermere to the timeless charm of Celebration, we’ve helped homeowners redefine their environments through high-quality craftsmanship. Our service is a partnership. We listen to your aesthetic goals and translate them into a high-texture reality that adds significant value to your home. This is more than a service; it’s a dedicated transformation of your daily living space that reflects your personal style and high professional standards.
Start Your Home Transformation Today
To explore how this level of high-end craftsmanship extends to other bespoke elements like custom furniture and artistic interior agencements, you can learn more about Eben&Or and their dedication to creating unique, heritage-quality pieces.
Starting your transformation is as simple as a conversation. We guide you through the entire project-based service, managing everything from material sourcing and precision cutting to the final, factory-finish coat. You get to skip the confusion of adhesive choices and the fear of damaging expensive wood panels. Instead, you get a seamless experience and a luxury result that feels both expert and inviting. If you’re ready to elevate your space with a professional 3D wood wall panels installation, we’re here to make it happen. Book your custom accent wall consultation today and see how our precision can revitalize your home.
Elevate Your Space with Precision and Vision
A successful 3D wood wall panels installation relies on more than just the panels themselves. It demands careful wall preparation to ensure a flat substrate and a patient acclimation period to respect the Central Florida climate. The difference between a simple project and a luxury architectural feature lies in the precision of the layout and the quality of the final finish. Professional execution ensures your geometric patterns remain stable and stunning for years to come.
If you’re ready to move beyond the DIY headache and achieve a truly sophisticated result, we are here to partner with you. Serving Orlando and surrounding high-end communities since 2018, we specialize in custom wood geometric designs that bring a unique energy to any room. Transform your home with a custom 3D wood accent wall from Orlando’s experts and experience the quality of our high-durability factory-finish coatings first-hand.
Your living space is an investment in your daily peace and inspiration. Take the next step toward your home’s revitalization today and enjoy the lasting impact of a professionally crafted environment.
Frequently Asked Questions
Can I install 3D wood panels over existing wallpaper?
Wallpaper removal is essential because a successful 3D wood wall panels installation requires a direct, permanent bond with the drywall. Wallpaper glue can weaken over time, especially in Orlando’s humid climate, which might cause the weight of the panels to pull the paper off the wall. You should strip the paper, clean the adhesive residue, and prime the surface to ensure your new feature wall stays securely in place.
How do I clean and maintain 3D wood wall panels?
Regular maintenance is simple but vital for preserving the wood’s natural beauty. Use a soft-bristle vacuum attachment or a microfiber duster to remove dust from the intricate peaks and valleys of the texture. For deeper cleaning, a slightly damp cloth with mild soap works well, but never saturate the wood. Avoid harsh chemicals that can strip the high-durability factory-finish coatings we apply during a professional installation.
What is the best adhesive for 3D wood panels in Florida’s humidity?
You should use a high-tack, polyurethane-based construction adhesive that is specifically rated for high-moisture environments. Central Florida’s relative humidity often fluctuates, which causes wood to expand and contract. A flexible but strong adhesive ensures the panels don’t pop off the wall during seasonal changes. We always recommend pairing this with 18-gauge brad nails for a mechanical hold while the glue sets in your Windermere or Celebration home.
Do I need to remove my baseboards before installation?
Removing your baseboards is the best way to achieve a seamless, high-end look. It allows the panels to run all the way to the floor, creating a continuous vertical line. Once the panels are installed, you can reinstall the baseboards over the wood or use a slim transition piece. This small extra step is what separates a standard DIY project from a truly professional architectural feature in your living space.
Can 3D wood panels be installed in a bathroom?
Natural wood panels are not recommended for areas with direct water contact or extreme steam, such as small, unventilated bathrooms. However, they can work beautifully in large powder rooms with proper ventilation. If you love the look for a master bath, consider sustainable MDF or PVC composites. These materials offer the same texture but resist the warping and mold issues common in damp Florida environments.
How do I handle the edges where the panels meet the ceiling?
Most homeowners prefer a clean, butt joint against the ceiling, but this requires a perfectly level top row. You should leave a tiny expansion gap of about one-eighth of an inch to allow for natural wood movement. This gap can be hidden with a thin piece of trim or a bead of color-matched caulk. For a more traditional look, crown molding can be installed directly over the top edge of the panels.
Are 3D wood panels good for soundproofing?
While they aren’t a total soundproofing solution, 3D panels significantly improve room acoustics by breaking up flat surfaces that cause echoes. Slat-style panels are particularly effective at diffusing sound waves. Many of the high-end designs we install in home offices across Winter Park have a Noise Reduction Coefficient of around 0.5. This means they can absorb about half of the sound that strikes them, creating a much quieter environment.
What should I do if my wall is not perfectly flat?
You must address wall irregularities before the first panel is mounted during your 3D wood wall panels installation. Use a long straightedge to identify humps or valleys in the drywall. Sand down high spots and use a setting-type joint compound to fill in the low areas. If the wall is severely bowed, you might need to use thin wooden shims behind specific panels to maintain a flat plane.