Kitchen Cabinet Refinishing in Kissimmee: Installing Hardware After Painting
What if the last step in your kitchen cabinet refinishing in Kissimmee is also the easiest place to mark a fresh finish? It’s tempting to reinstall knobs and pulls as soon as the paint feels dry, but the coating may need more time to harden. A clear measurement plan helps prevent crooked hardware, unnecessary holes, and avoidable touch-ups.
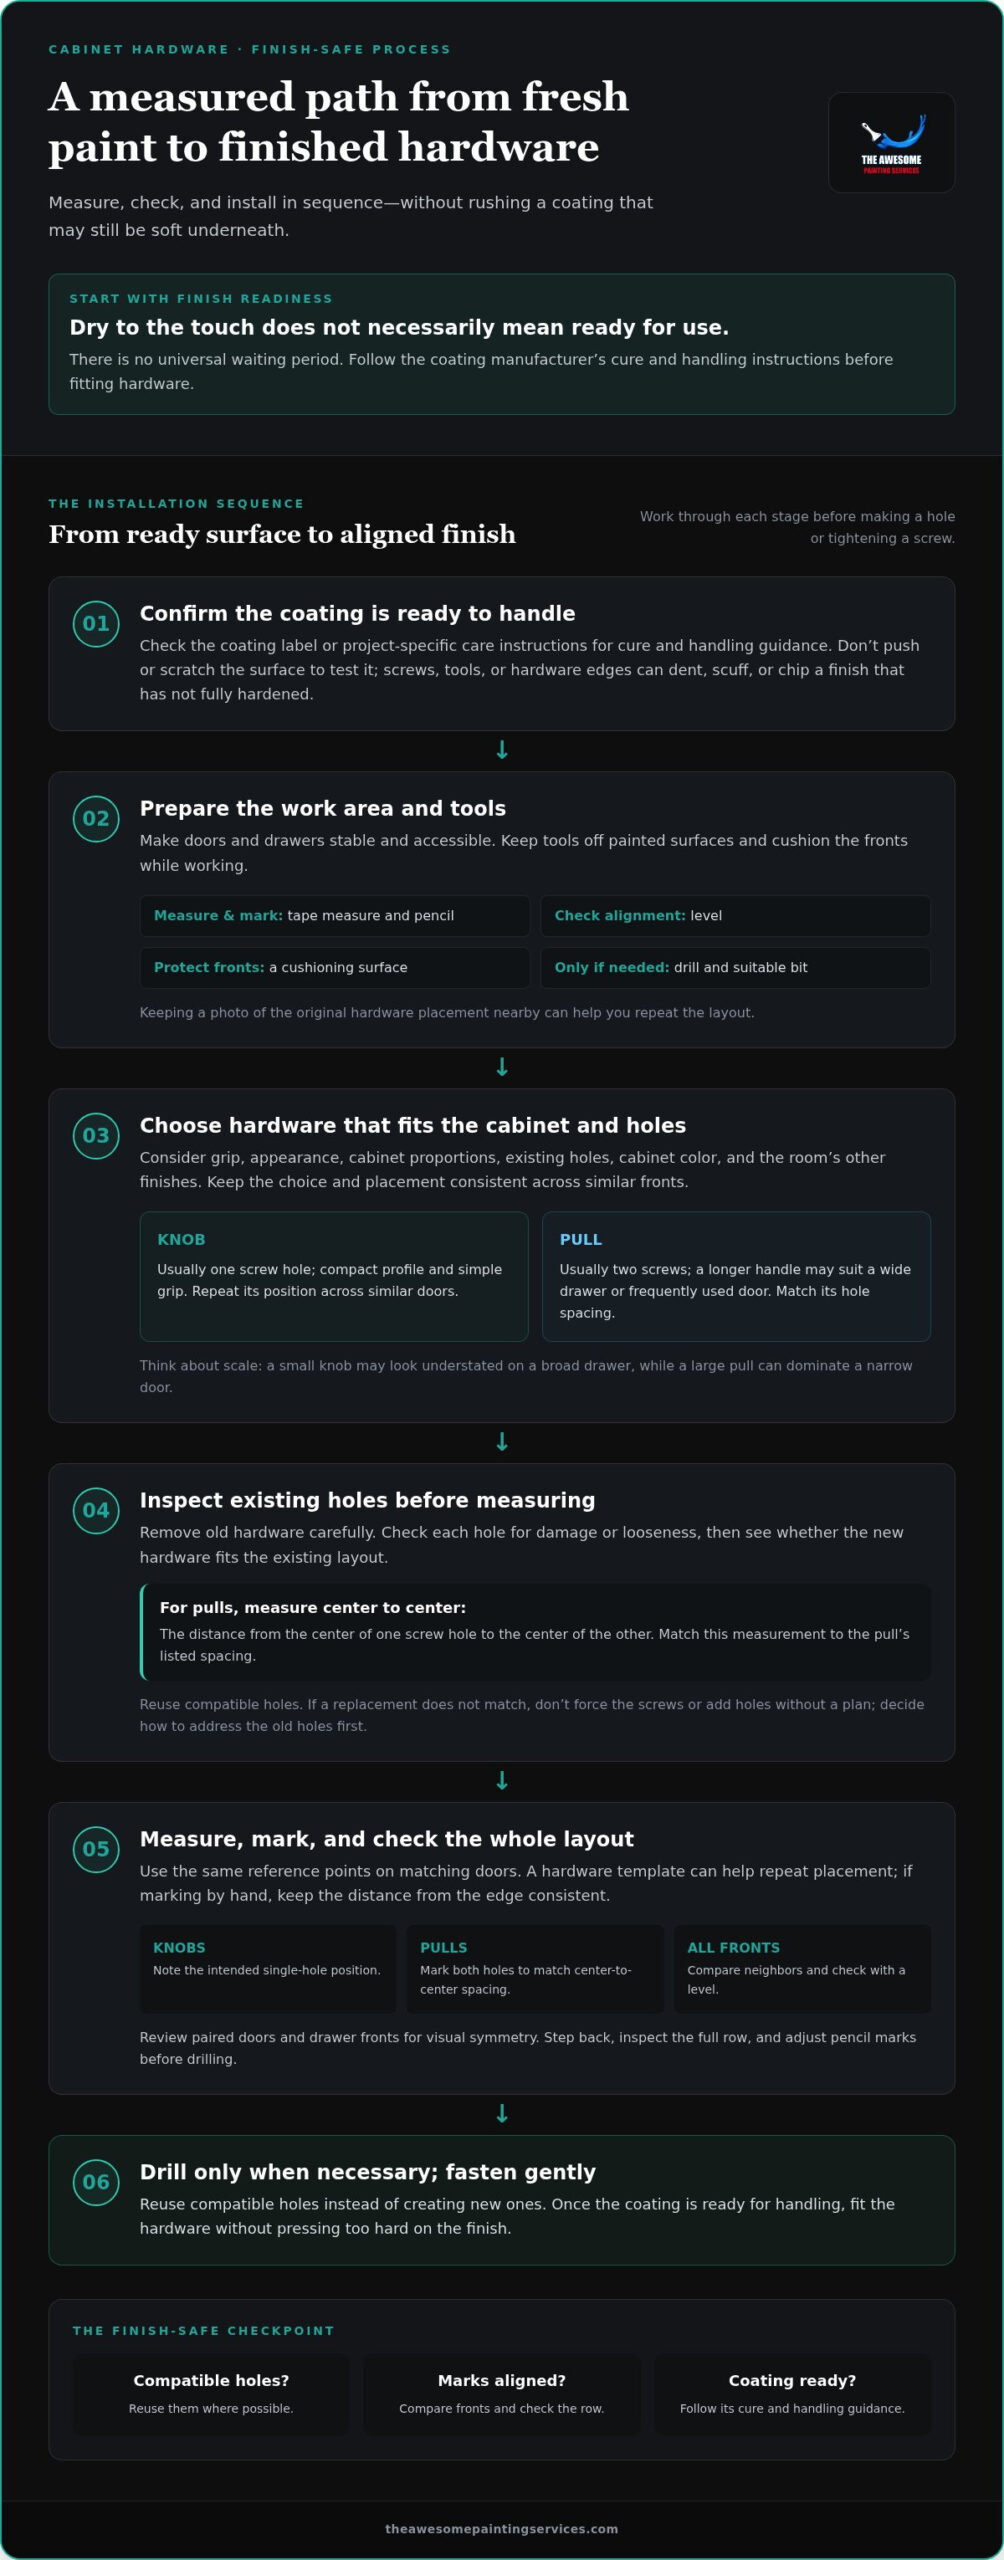
Choose hardware that suits your cabinet style and fits the existing holes where possible. Then measure and mark each position, check alignment, and install the hardware only when the coating is ready for handling. Follow the coating manufacturer’s cure and care instructions: dry to the touch does not necessarily mean ready for use.
With a little preparation, hardware can bring the whole look together. If the cabinets need a new finish before those final details go on, The Awesome Painting Services provides kitchen cabinet refinishing in Kissimmee and throughout the Orlando area.
Key Takeaways
- Measure and mark every position, then check alignment before drilling.
- Choose hardware based on grip, appearance, cabinet proportions, and existing holes.
- For pulls, match the distance between screw-hole centers to the hardware’s listed spacing.
- Protect freshly painted surfaces and follow the coating manufacturer’s cure and handling instructions before installation.
- Consistent placement helps complete kitchen cabinet refinishing Kissimmee homeowners can feel proud of.
Installing cabinet hardware after painting in Kissimmee: start with finish readiness
A refreshed cabinet should look polished after the knobs and pulls go back on, not marked by fingerprints, pressure, or a misplaced drill hole. Hardware installation involves measuring and aligning each piece, drilling new holes only when necessary, and fastening the hardware without pressing too hard on the finish. Treat it as a measured final stage of kitchen cabinet refinishing in Kissimmee.
Paint that feels dry on the surface may still be soft underneath. Pressing hardware against it or tightening screws too soon can leave dents, scuffs, or chips. A cabinet coating is part of the broader wood finishing process, which includes applying protective coats. Follow the coating’s instructions for when it is ready to handle.
How long should painted cabinets cure before hardware goes on?
There’s no universal waiting period. The coating, how it was applied, and the conditions during the project can all affect when the surface is ready to handle. Check the coating label or project-specific care instructions, and follow the manufacturer’s current cure and handling guidance before fitting hardware. Coating-specific cure guidance determines when cabinets are ready for hardware.
Rushing can let a screw head, tool, or hardware edge press into a finish that hasn’t fully hardened. If you’re unsure, follow the coating’s stated guidance rather than testing the surface by pushing or scratching it.
What to prepare before installing cabinet knobs and pulls
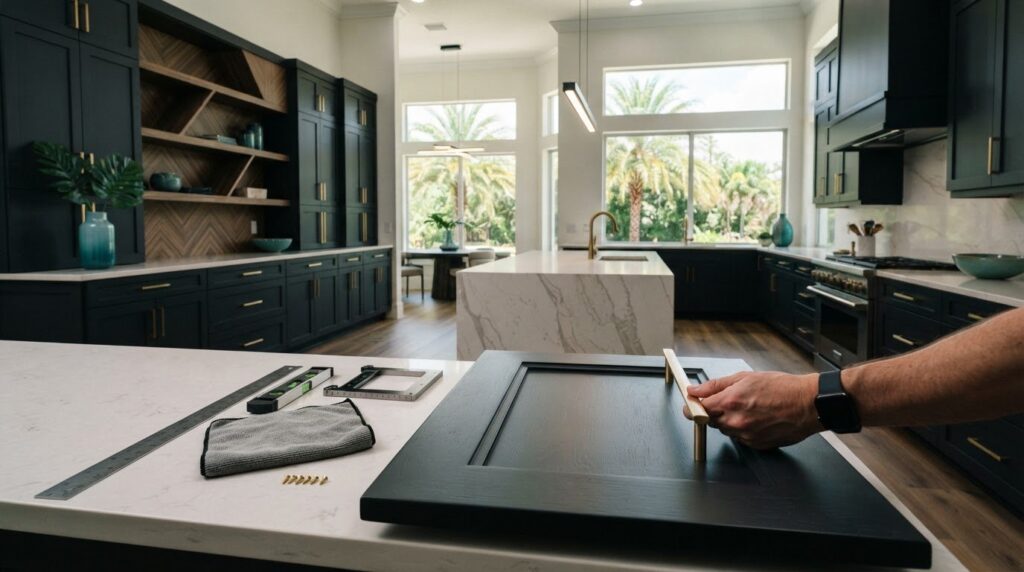
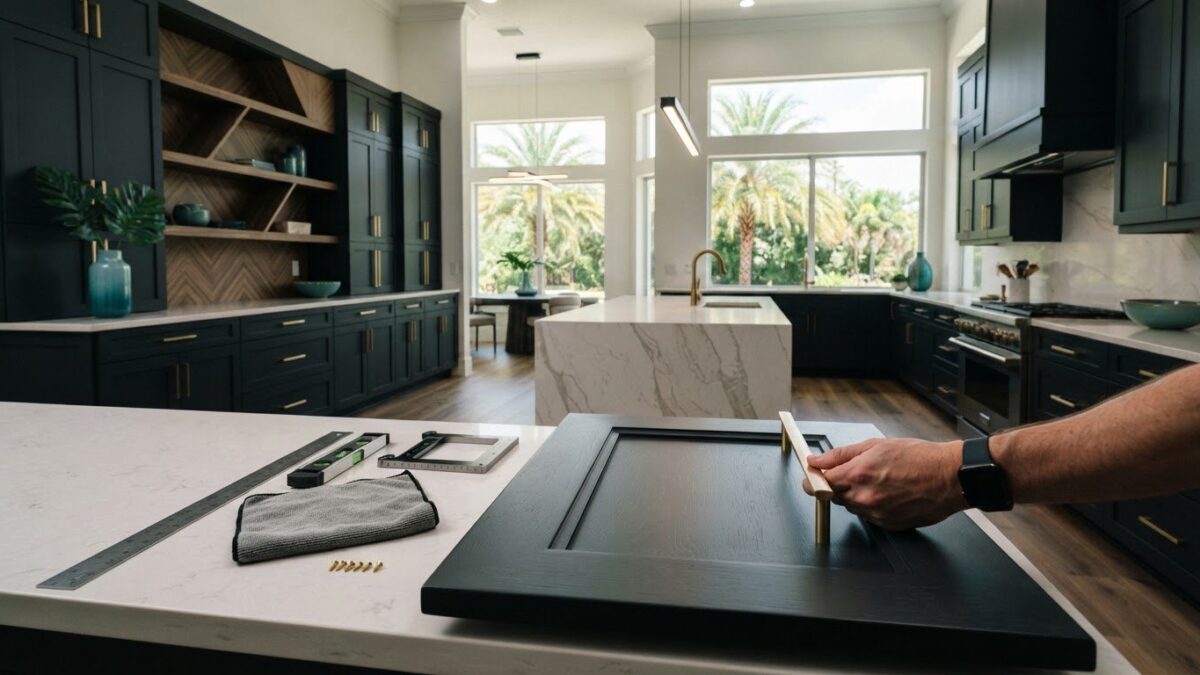
Gather your tools before marking the cabinet fronts. A clear work area makes it easier to check measurements and prevents tools from resting on painted surfaces. Make sure doors and drawers are stable and accessible. If you want to keep the original layout, take a photo of the hardware placement before removing it.
- Tape measure and pencil for measuring and marking
- Level to check that marks align
- Drill and a suitable bit, ready for use only if new holes are needed
- A protective surface to cushion doors or drawers while you work
Keep the photos and measurements nearby as you work through the kitchen. This preparation helps you repeat the same placement and protect the finish from unnecessary handling.
Measure cabinet doors and drawers accurately before drilling
Careful measuring helps knobs and pulls sit consistently across the kitchen. Use the same sequence for each cabinet front: inspect, measure, mark, check alignment, then drill only if needed. Small differences are especially noticeable when matching doors or drawer fronts sit side by side.
- Inspect: Check each door and drawer front, including existing holes and the surrounding surface.
- Measure: Note the position for a knob or the spacing between holes for a pull.
- Mark: Make a light pencil mark at the intended position.
- Check: Compare the mark with neighboring fronts and use a level to confirm alignment.
- Drill only if needed: Reuse compatible holes instead of creating new ones.
For pulls, measure from the center of one screw hole to the center of the other. Center-to-center measurement is the distance between the two screw-hole centers. Match that measurement to the pull before marking or drilling. Knobs generally use one screw hole, so focus on repeating their position across similar doors.
How to reuse existing cabinet hardware holes
Remove the old hardware carefully, then inspect the holes for damage or looseness. For a pull, measure between the centers of its existing screw holes and look for a replacement with the same spacing. If the new hardware doesn’t match, don’t force the screws or add holes without a plan. Decide how to address the old holes before fitting hardware with a different layout.
How to mark new knob and pull positions
A hardware template can help repeat the same placement across matching doors. If you’re marking by hand, choose consistent reference points, such as the same distance from the edge of each door, and use them for every matching front. Check paired doors and drawer fronts for visual symmetry, then use a level and step back to review the full row of marks. Adjust pencil marks before drilling.
Compare every mark with neighboring doors and drawers before making a hole. Look at the cabinet as a whole, not just one front at a time. This final check helps keep the layout balanced. For a cohesive cabinet refresh, explore professional kitchen cabinet refinishing from The Awesome Painting Services.
Choose cabinet hardware that fits the painted kitchen and existing holes
The right knobs or pulls should feel comfortable to use, suit the cabinet fronts, and fit the holes already in place. A kitchen cabinet refinishing Kissimmee project brings practical fit and visual detail together. Consider the cabinet color, the room’s other finishes, and how the hardware looks across the kitchen. Warm or cool metal tones can complement painted cabinets in different ways, so compare them with the colors and finishes already in the room.
Knobs or pulls: what works best for your cabinet layout?
Knobs generally attach at one point, while pulls usually use two screws. Knobs have a compact profile and a simple grip. Pulls provide a longer handle that may be more comfortable on a wide drawer or frequently used door. Consider scale as well as function: a small knob may look understated on a broad drawer, while a large pull can dominate a narrow door. Choose hardware that suits the cabinet proportions, then keep its placement consistent across similar fronts.
| Hardware type | Hole requirements | Practical fit considerations |
|---|---|---|
| Knob | Usually one screw hole | Check grip and position on each matching door. |
| Pull | Usually two screw holes | Match the screw-hole spacing and consider the drawer or door size. |
How to match new hardware to old screw-hole spacing
Reusing existing holes can prevent unnecessary drilling. Measure from the center of one hole to the center of the other, then compare that distance with the replacement pull’s listed screw-hole spacing. During kitchen cabinet refinishing in Kissimmee, matching new hardware to existing holes can help preserve a clean cabinet look. Check product dimensions before choosing, since pulls that look similar may have different attachment layouts. For a knob, check that the existing hole is in a suitable position and that the replacement screw fits.
If the new hardware has a different layout, the old holes may need to be filled and the surface refinished before installation. Don’t force a mismatched screw or leave an unused hole visible. Plan how to address the holes so the finished surface looks neat. If you’re weighing a cabinet refresh against replacement, consider the condition of the cabinet boxes and doors, the finish you want, and the scope of the work involved.
Install cabinet hardware without damaging fresh paint
Once the coating is ready for handling, a deliberate sequence helps protect the finish and keep each knob or pull straight. Work on one cabinet front at a time. Protect nearby surfaces, mark and verify the position, drill only where needed, then fasten the hardware gently. For kitchen cabinet refinishing in Kissimmee, careful handling is an important final detail in a cohesive refresh.
A careful step-by-step cabinet hardware installation process
- Protect: Cover nearby counters and place a protective surface beneath any door or drawer you remove. If drilling through a cabinet front, support the back of the area to help reduce splintering as the bit exits.
- Mark and verify: Use your measured reference points, then check the marks against neighboring fronts before making a hole.
- Drill if needed: Choose a sharp bit suited to the cabinet material and screw size. Keep the drill perpendicular to the surface and use controlled pressure rather than forcing the bit through.
- Clear debris: Remove dust gently with a soft brush or vacuum attachment. Avoid dragging tools or debris across the painted face.
- Fasten: Fit the hardware and tighten the screws until secure. Stop before excessive pressure pulls the hardware tightly against or compresses the painted surface.
Take your time at each step. Keeping the drill steady helps make clean holes, while gentle fastening reduces the risk of denting or chipping the finish around the hardware.
Common mistakes that can spoil a cabinet finish
Installing hardware before the coating is ready to handle can leave marks beneath it or damage the paint while you work. Follow the coating manufacturer’s current cure and handling instructions rather than relying on how the surface feels. Humidity and airflow can affect drying conditions, but the coating’s specific guidance should determine when you proceed.
Inconsistent measurements, rushed drilling, and excessive screw pressure can lead to crooked hardware or surface damage. If a mark looks out of line, stop and recheck it before drilling. If a hole doesn’t match the hardware or begins to chip, pause rather than forcing the screw or enlarging the opening without a plan. Reassessing the fit can prevent a small issue from becoming a visible repair.
Careful surface preparation and finish protection are central to a polished cabinet refresh. If you’re planning kitchen cabinet refinishing in Kissimmee, explore cabinet refinishing with The Awesome Painting Services.
Finish your Kissimmee cabinet refresh with professional refinishing support
Installing hardware yourself can work well when the cabinet fronts are sound, your measurements are clear, and the new knobs or pulls match the existing holes. If doors are damaged, holes don’t line up, or the painted surface needs attention, pause before drilling or fastening. A cohesive refresh depends on both the hardware layout and the condition of the cabinets beneath it.
Professional refinishing brings cabinet color, surface preparation, and a new finish together. For homeowners considering kitchen cabinet refinishing in Kissimmee, the right approach depends on the cabinet surfaces and the look you want. Refinishing refreshes existing cabinets, while replacement is a separate project decision.
When does cabinet refinishing support the hardware upgrade?
Fresh cabinet color and thoughtfully positioned hardware work together to shape the kitchen’s overall appearance. Refinishing may be worth considering if the current finish is worn or the color no longer suits your space. The cabinet surface and your goals help determine the preparation and refinishing approach. If your plans extend beyond cabinets to walls or other painted areas, an interior painting guide can help you think through broader paint preparation.
Plan the next step for your kitchen cabinet refresh
Keep the sequence simple: choose hardware with the cabinet layout in mind, prepare and refinish the cabinet surfaces, follow the coating’s cure guidance, then install the hardware. That order helps protect the finish and gives you a clear path from planning to the final detail.
Before planning the project, gather photos of the cabinet doors, drawers, and overall kitchen. Note the finish or color you want, whether you plan to reuse existing holes, and any concerns about the cabinet surfaces. These details help define the look you want to achieve.
The Awesome Painting Services provides kitchen cabinet refinishing in Kissimmee and across the Orlando area, including Winter Park, Windermere, Winter Springs, Celebration, Clermont, Zellwood, Alafaya, and Oviedo. Explore cabinet refinishing for your kitchen and plan the refreshed look you want to create.
Make the Final Details Count in Your Cabinet Refresh
Well-chosen hardware can bring a freshly painted kitchen together, but a polished result starts before the first screw goes in. Confirm that the coating is ready for handling, measure carefully, and check each mark against neighboring doors and drawers. Match new pulls to existing hole spacing where possible, and protect the surface while drilling and fastening.
If your cabinet fronts need more than a hardware update, professional refinishing can create a cohesive foundation for the finishing details. Kitchen cabinet refinishing Kissimmee homeowners can turn to is among the services offered by The Awesome Painting Services, serving Kissimmee and the Orlando area.
Ready to plan your cabinet refresh? Explore cabinet refinishing for your Kissimmee home and take the next step toward a refreshed kitchen.
Frequently Asked Questions
How long should I wait to install cabinet hardware after painting?
Wait until the paint or coating is ready for handling, following the manufacturer’s cure and care instructions. There isn’t one waiting period that suits every product or project. A surface can feel dry before it has hardened enough to withstand screw pressure, tools, or repeated handling. Airflow and humidity can affect drying conditions, so don’t decide based only on how the finish feels.
Can I reuse the existing holes when replacing cabinet hardware?
Often, you can reuse existing holes if the replacement hardware’s screw positions match. Remove the old hardware carefully, inspect the holes, and measure between the centers of the screw holes for a pull. Knobs generally use one hole. If the spacing differs, plan how to fill and refinish the old holes before installing the replacement, rather than forcing screws or leaving an unwanted opening visible.
How do I measure cabinet pull spacing correctly?
Measure from the center of one screw hole to the center of the other, not across the pull’s full length. Compare that measurement with the replacement hardware’s listed hole spacing. Check the existing placements on doors and drawers, since they may vary. Before drilling, confirm that the pull fits the measured holes and review its position against neighboring cabinet fronts.
Should I install cabinet knobs or pulls after painting?
Either can work. Choose based on your cabinet layout, how you use the doors and drawers, and whether you want to reuse existing holes. Knobs usually attach at one point, while pulls commonly use two. A pull may feel convenient on a wide drawer, while a knob can suit a smaller door. Keep placement consistent across similar fronts for a coordinated appearance.
How can I keep cabinet paint from chipping when installing hardware?
Wait until the coating is ready for handling, then protect nearby surfaces and verify each mark before drilling. Use a sharp bit suited to the cabinet material and work with controlled pressure. Support the back of the cabinet front where drilling is needed, and clear debris without scraping the paint. Tighten screws securely, but don’t force them against the painted surface.
Can I install new cabinet hardware without drilling new holes?
Yes, if the replacement hardware’s screw positions match the existing holes and the cabinet fronts are sound. Measure the current hole spacing and compare it with the hardware dimensions before purchasing or installing. If the layout differs, new holes or repairs may be needed. Plan those steps carefully so old openings can be filled and the painted finish remains neat.
Does humidity in Kissimmee affect cabinet hardware installation after painting?
Humidity and airflow can affect how a coating dries, but the impact depends on the product and conditions in your home. Don’t assume a fixed wait based on the season or location. Follow the coating manufacturer’s cure and handling instructions before touching, drilling, or fastening. This matters for kitchen cabinet refinishing in Kissimmee, where protecting the new finish helps complete a polished refresh.