
Transform Your Home with Elegant Crown Molding: A Comprehensive Guide
Thinking about adding some fancy trim to your ceilings? Crown molding can really change a room’s look. It adds a touch of class that’s hard to beat. Installing it yourself might seem like a weekend project, but it can get tricky fast. That’s where knowing the right steps comes in handy. We’ll walk you through picking the style, getting ready, putting it up, and making it look great. And when it comes to making your newly molded spaces shine, The Awesome Painting Services in Orlando is here to help with expert painting.
Key Takeaways
- Choosing the right crown molding style means looking at your home’s architecture and thinking about what materials work best for your space.
- Before you start, measure your room carefully and get all your tools ready. Make sure your walls and ceilings are in good shape for the best results.
- Proper installation involves cutting angles just right, securing the molding firmly, and fixing any gaps for a clean look.
- Finishing touches like filling, sanding, priming, and painting are key to making your crown molding look professional and last longer.
- For a perfect paint job on your new crown molding, especially in Orlando, consider professional painters like The Awesome Painting Services for a flawless finish.
Choosing The Perfect Crown Molding Style
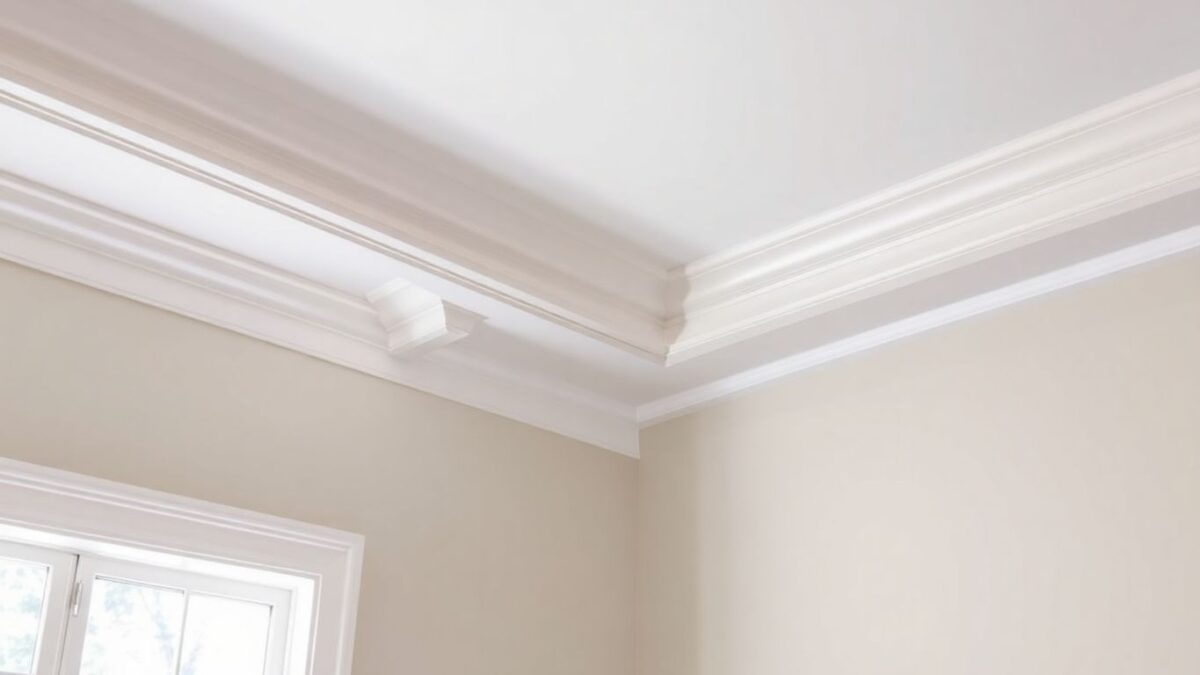
Picking out the right crown molding can really change how a room feels. It’s not just a strip of wood; it’s a design element that adds character and polish. Think of it as the finishing touch that ties everything together, making your ceilings look taller and your walls more defined.
Understanding Different Crown Molding Profiles
Crown molding comes in all sorts of shapes and sizes, and each profile has its own vibe. Some are simple and clean, while others are quite ornate. The profile is basically the shape of the molding’s face. You’ve got your basic cove molding, which is a simple curve, and then you get into more complex profiles with multiple curves, angles, and decorative details.
Here are a few common types you’ll see:
- Cove Molding: This is the most straightforward, with a simple concave curve. It’s great for a modern or minimalist look.
- Ogee Molding: This profile has an ‘S’ shape, offering a bit more visual interest than a plain cove.
- Dentil Molding: Characterized by a series of small, square blocks evenly spaced, dentil molding adds a classical touch.
- Craftsman Molding: Often features a flatter profile with simpler, geometric lines, fitting well with Arts and Crafts style homes.
The key is to pick a profile that matches the overall style of your home and the room you’re working in. Too much detail in a simple room can look out of place, and too little in a grander space might get lost.
Matching Molding to Your Home’s Architecture
Your home’s architectural style is a big hint for choosing the right crown molding. A grand Victorian house might call for something elaborate with lots of curves and details, while a mid-century modern home would probably look best with a sleeker, simpler profile. It’s all about creating a cohesive look.
- Traditional Homes (Victorian, Colonial, Georgian): These styles often suit more elaborate, detailed moldings. Think multiple curves, possibly with dentil or egg-and-dart details.
- Mid-Century Modern Homes: Clean lines and simplicity are key here. A flat or gently curved, unadorned profile works well.
- Craftsman Homes: Look for moldings with a bit of heft and simpler, geometric shapes. Often, they have a flatter face than traditional moldings.
- Contemporary Homes: You have more freedom here, but often a simple, clean profile or even a very wide, flat molding can make a statement.
Don’t be afraid to look at other homes in your neighborhood or browse design magazines for inspiration. Sometimes seeing it in context helps a lot.
Considering Material Options For Your Molding
What your crown molding is made of matters, not just for looks but also for how easy it is to work with and how much it costs.
Here’s a quick rundown of common materials:
- Wood (Pine, Poplar, Oak, Maple): This is a classic choice. Wood is sturdy, can be painted or stained, and offers a natural look. Pine and poplar are more budget-friendly and easier to cut, while hardwoods like oak and maple are more durable and look great stained. You’ll need to prime and paint or stain wood molding.
- Polyurethane/Foam: These synthetic materials are lightweight, often pre-primed, and can mimic the look of wood. They’re resistant to moisture and insects, making them a good choice for kitchens or bathrooms. They’re also generally easier to install because they’re lighter and can be cut with standard tools.
- MDF (Medium-Density Fiberboard): This is an engineered wood product. It’s smooth, takes paint really well, and is usually less expensive than solid wood. However, it’s heavy and can be damaged by moisture, so it’s best for dry areas and needs to be handled carefully during installation.
Your budget and where you’re installing the molding will help guide you to the best material. For a DIYer, polyurethane or a softer wood like pine might be the easiest to start with.
Preparing For Crown Molding Installation
Getting ready for crown molding is kind of like prepping for a big DIY project – you gotta have your ducks in a row before you start. It might seem like a lot, but taking the time now saves you headaches later. Accurate measurements are your best friend here.
Measuring Your Room Accurately
This is where you don’t want to mess up. Grab your tape measure and get to it. You’ll want to measure the length of each wall. Don’t just do one measurement per wall; measure in a couple of spots, especially if your walls aren’t perfectly straight (and whose are?).
- Measure the length of each wall.
- Add up all the wall lengths to get your total linear footage.
- Always add a little extra, maybe 10-15%, for mistakes, cuts, and those tricky corners. You’d rather have a bit left over than run short mid-job.
Gathering The Right Tools And Supplies
Having the right gear makes the job go way smoother. You don’t need a professional workshop, but a few key items will make a big difference.
Here’s a quick rundown of what you’ll likely need:
- Measuring Tape: A good, sturdy one.
- Miter Saw: This is pretty important for getting those angled cuts right. A hand saw with a miter box can work in a pinch, but a power saw is much easier.
- Caulk Gun and Caulk: For filling small gaps.
- Nail Gun (Brad Nailer) and Nails: Makes attaching the molding much faster and cleaner than hammering.
- Stud Finder: To locate wall studs for secure attachment.
- Level: To make sure everything is straight.
- Safety Glasses: Always protect your eyes!
- Ladder or Scaffolding: Depending on your ceiling height.
- Pencil: For marking.
- Utility Knife: For trimming.
Ensuring Walls And Ceilings Are Ready
Before that beautiful molding goes up, take a look at where it’s going. You want a clean slate.
Make sure the surfaces where the molding will attach are clean, dry, and free of any loose paint or wallpaper. Any bumps or imperfections on the wall or ceiling will show up once the molding is installed, so it’s worth taking a few minutes to smooth things out.
If you have old caulk or paint buildup where the molding will sit, gently scrape it away. This gives the new molding a better surface to adhere to and makes for a neater finish. Also, give the walls and ceiling a quick wipe-down to get rid of dust. It’s the little things that make a big difference in the final look.
Mastering Crown Molding Installation Techniques
Alright, so you’ve picked out the perfect crown molding and prepped your space. Now comes the fun part – actually getting it up on the wall! It might seem a little intimidating at first, but with a bit of patience and the right approach, you can totally nail this. Getting those cuts just right is the secret to a professional-looking finish.
Cutting Precise Angles For A Seamless Fit
This is where things get a little tricky, but it’s super important. You’ll be working with angles, and they need to be spot on so the molding pieces meet up nicely without any weird gaps. Most inside corners are 90 degrees, meaning you’ll need to cut your molding at a 45-degree angle. Outside corners can be a bit different, depending on how your walls meet. A miter saw is your best friend here. You’ll want to set it to the correct angle – usually 45 degrees for inside corners and whatever the complementary angle is for outside corners. It’s a good idea to practice on some scrap pieces first. Seriously, don’t skip this step! You’re looking for a snug fit, like puzzle pieces.
Securing Your Crown Molding Professionally
Once you’ve got your cuts looking good, it’s time to get them attached. You’ll want to use a good quality adhesive caulk along the back of the molding where it will meet the wall and ceiling. Then, you’ll use finishing nails to secure it. A nail gun makes this way easier and faster, but you can also do it with a hammer if you’re careful. Start by nailing into the studs in the wall – this gives you the strongest hold. You can find studs using a stud finder. Space your nails out every 16 to 24 inches. Make sure the nails go in straight and don’t split the wood. You want them to sink just a little below the surface so you can fill them later.
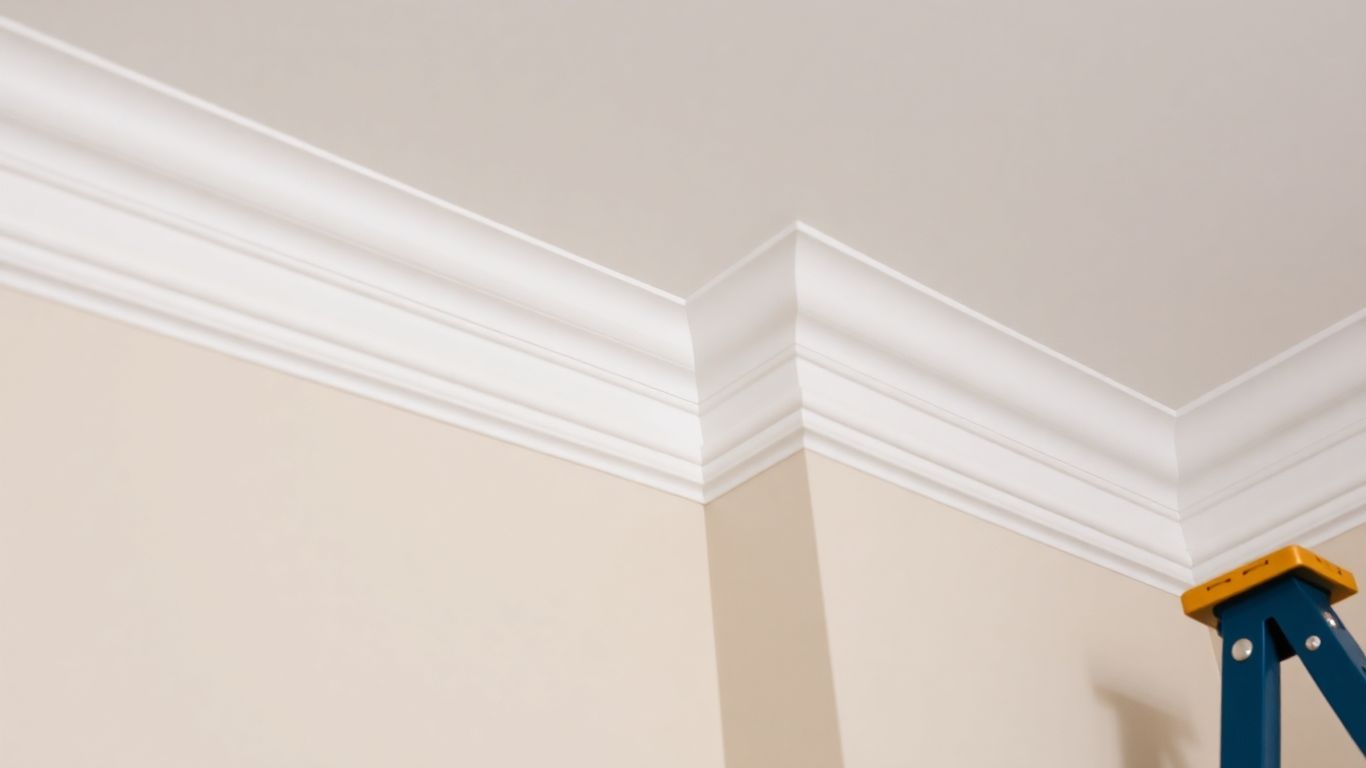
Achieving Flawless Joints And Corners
This is the part that really makes your molding look like it’s always been there. For joints where two pieces of molding meet on a straight wall, you’ll want to cut them at a 45-degree angle, but in opposite directions. This is called a scarf joint. It creates a longer, more gradual seam than just butting them together. For corners, as we talked about, precise miter cuts are key. If you do end up with tiny gaps after everything is up, don’t sweat it. A little bit of wood filler or caulk can work wonders. Just make sure to smooth it out before it dries.
Working with crown molding requires a bit of finesse, especially when it comes to the angles. Taking your time with the measurements and cuts will save you a lot of headaches down the line. It’s better to make a few extra cuts than to try and force a bad fit.
Here’s a quick rundown of what you’ll need:
- Miter saw (manual or power)
- Measuring tape
- Pencil
- Stud finder
- Finishing nails (16-gauge or 18-gauge are common)
- Nail gun (optional, but helpful)
- Adhesive caulk
- Wood filler or painter’s caulk
- Hammer (if not using a nail gun)
- Safety glasses
The Art Of Finishing Your Crown Molding
So, you’ve got your crown molding up, looking pretty good. But wait, the job isn’t quite done yet! The finishing touches are what really make it pop and look like a pro job. It’s all about making those seams disappear and giving your molding a smooth, clean look that lasts. Don’t skip these steps, or your hard work might not get the attention it deserves.
Filling Gaps And Sanding For Smoothness
After all that cutting and fitting, you’re bound to have some small gaps or nail holes. No worries, that’s what wood filler and caulk are for! For nail holes and small gaps between the molding and the wall or ceiling, a good quality wood filler works wonders. Just press it in with a putty knife, let it dry completely, and then sand it smooth. For the tiny gap where the molding meets the wall or ceiling, paintable caulk is your best friend. Run a thin bead along the seam, smooth it out with a damp cloth or your finger, and wipe away any excess. This makes the molding look like it’s part of the wall itself.
- Fill nail holes: Use wood filler and let it dry.
- Caulk seams: Apply paintable caulk where molding meets wall/ceiling.
- Smooth caulk: Wipe away excess for a clean line.
- Sand filler: Gently sand dried filler until flush.
Remember, patience is key here. Rushing the drying time for filler or caulk can lead to cracks or an uneven finish later on. Take your time, and the results will be worth it.
Priming For A Lasting Finish
Before you even think about paint, you need to prime. Primer is like a secret weapon for paint jobs. It seals the wood (or whatever your molding is made of), stops any stains from bleeding through, and gives your paint something to stick to. This means your final paint color will look truer and more vibrant. Plus, it helps create a really smooth surface for the paint to go on. You’ll want to use a good quality primer, especially if you’re painting over a dark color or a glossy finish. Apply it evenly, making sure to get into any nooks and crannies.
Painting Your Crown Molding To Perfection
Now for the fun part – painting! Most people go with white or a shade close to their ceiling color, but don’t be afraid to get creative. Whatever color you choose, make sure it complements your room. You’ll want to use a good quality paint, usually a satin or semi-gloss finish, as it’s durable and easy to clean. Apply thin, even coats. Trying to cover everything in one thick coat usually leads to drips and an uneven look. It might take two or even three coats to get that solid, professional finish. Let each coat dry completely before applying the next. And don’t forget to clean your brushes and rollers right away!
| Paint Finish | Pros | Cons |
|---|---|---|
| Satin | Durable, easy to clean, slight sheen | Can show imperfections more than flat |
| Semi-Gloss | Very durable, washable, noticeable shine | Highlights surface flaws, can be too shiny for some tastes |
| Flat | Hides imperfections well, matte look | Less durable, harder to clean |
Getting that crisp line between the molding and the ceiling is all about careful brushwork or using painter’s tape.
Elevating Your Space With Crown Molding Accents
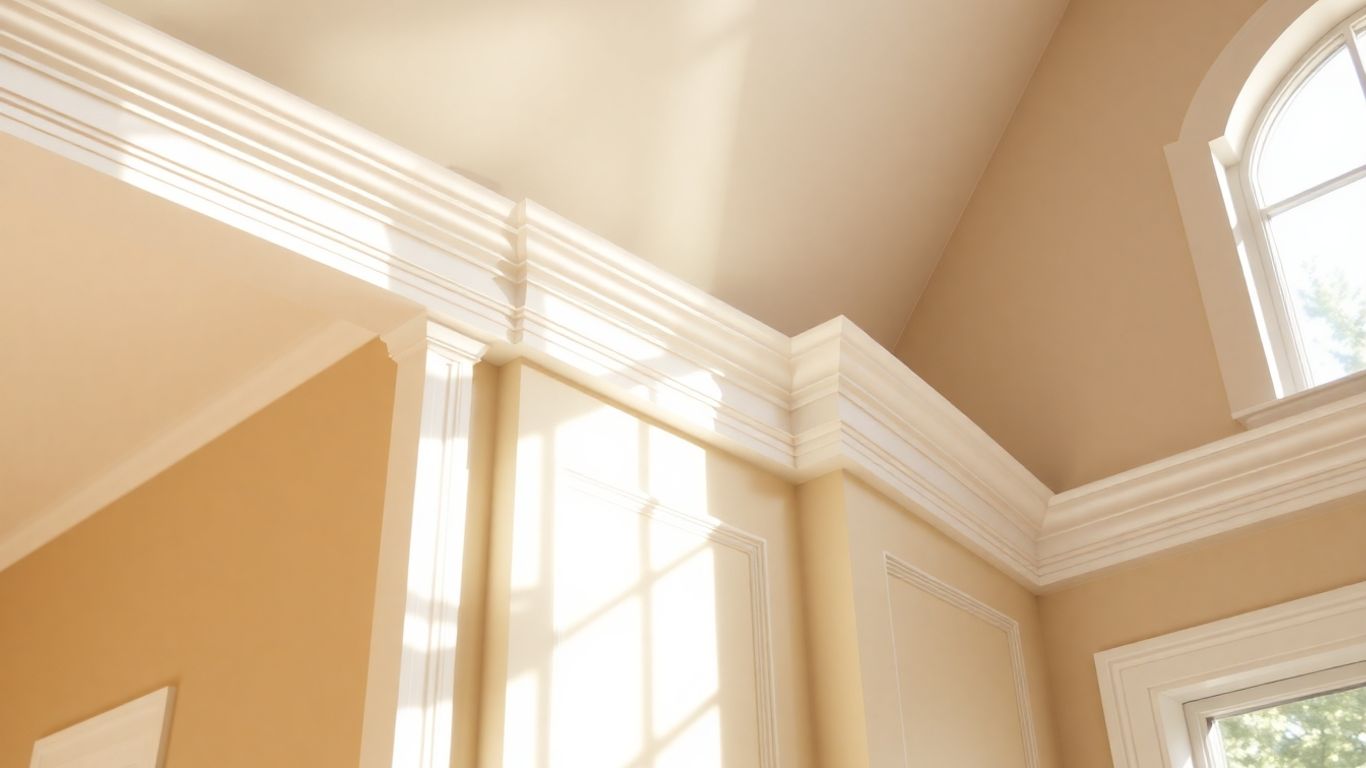
Crown molding isn’t just for grand dining rooms anymore. It’s a fantastic way to add a touch of polish to almost any room in your house. Think of it as the finishing jewelry for your walls. It can make a space feel more finished, more put-together, and honestly, just a bit more special. It’s a detail that makes a big difference.
Crown Molding for Living Room Sophistication
Your living room is often the heart of the home, where you entertain guests and relax. Adding crown molding here can really make the room feel more formal and inviting. It draws the eye upward, making the ceiling seem higher and the room feel more spacious. It’s a classic touch that works with many decor styles, from traditional to modern. A well-chosen molding profile can subtly transform the entire feel of your main gathering space.
Adding Elegance To Your Bedroom With Molding
Bedrooms are personal sanctuaries, and crown molding can add a layer of calm and sophistication. Imagine waking up in a room that feels a little more luxurious. It can make a simple bedroom feel like a boutique hotel suite. It’s a great way to add character without cluttering the space. You can even pair it with other decorative trim for a truly custom look. It’s a nice way to make your personal retreat feel even more special.
Transforming Kitchens With Stylish Crown Molding
Don’t overlook the kitchen! Crown molding can bring a surprising amount of style to your cooking space. It can bridge the gap between your cabinets and the ceiling, creating a more cohesive and finished appearance. This is especially true for kitchens with taller cabinets. It adds a custom cabinetry feel without the custom price tag. It’s a smart way to add architectural interest to a room that’s often overlooked for decorative trim. If you’re thinking about updating your kitchen, consider how molding can play a part. It’s a detail that can really make your kitchen stand out. For more ideas on making your home look its best, check out painting ceilings in Orlando.
Crown molding is a versatile architectural detail that can significantly improve the aesthetic appeal of various rooms. Its ability to define spaces, add perceived height, and introduce a sense of completeness makes it a worthwhile addition for homeowners looking to add character and value to their homes. It’s a relatively simple upgrade with a high impact.
Here are a few ideas to consider:
- Define the Room: Use molding to clearly separate walls from the ceiling, giving each surface its own distinct presence.
- Create a Focal Point: In rooms with interesting ceiling features, molding can help highlight them.
- Add Depth: Even a simple molding profile can add shadow lines and visual interest, making walls feel less flat.
- Pair with Lighting: Consider how cove lighting can be integrated with crown molding for a soft, ambient glow.
When To Call The Awesome Painting Services For Your Molding Project
So, you’ve gone through the steps, measured, cut, and installed your new crown molding. That’s a big accomplishment! But now comes the part that can really make or break the look: the finishing. If you’re feeling a little unsure about getting that perfect, smooth finish, or if you just want to make sure it looks professionally done, it might be time to bring in the pros. Getting the paint job right is just as important as the installation itself.
Expert Painting Services in Orlando
When you’re looking for painting help in the Orlando area, Awesome Painting Services is a name that comes up a lot. They handle all sorts of interior painting jobs, and they’re particularly good with details like crown molding. They know how to prep the surfaces properly, fill any little gaps or imperfections, and apply paint so it looks clean and sharp. It’s not just about slapping paint on; it’s about making sure every line is straight and every surface is smooth.
Seamless Interior Painting Orlando
If you’re aiming for that polished, magazine-worthy look throughout your home, Awesome Painting Services can help with that too. They focus on making the whole process feel easy for you. They understand that painting is more than just color; it’s about the overall feel of your space. They can work with you to pick the right finishes and colors that complement your new molding and the rest of your decor. It’s about creating a cohesive look that feels just right.
Requesting A Quote For Your Home Improvement Needs
Thinking about getting a quote is a smart move. It gives you a clear idea of what to expect, both in terms of cost and timeline. You can usually get a free estimate, which is a great way to compare options without any commitment. When you contact Awesome Painting Services, be ready to tell them a bit about your project. The more details you can provide, the more accurate their quote will be.
Here’s a quick rundown of what they typically consider:
- The total length of molding to be painted.
- The height and complexity of the molding profile.
- The current condition of the walls and ceiling.
- Whether you need patching or minor repairs done.
- The type of paint finish you prefer (e.g., matte, satin, semi-gloss).
Sometimes, the best way to get a truly professional result is to hand over the final, detailed work to people who do it every day. It saves you time, stress, and often, you end up with a better-looking outcome than you could have managed on your own. Think of it as an investment in your home’s appearance.
Don’t hesitate to reach out to them. They can help make sure your beautiful new crown molding gets the perfect finishing touch it deserves, contributing to the overall charm of your home. You can find out more about their services for projects like wainscoting and other decorative wall treatments.
Thinking about adding some fancy trim to your home? If you’re wondering when it’s the right time to get professional help for your molding project, don’t wait too long! Our team at Awesome Painting Services is ready to make your home look its best. Visit our website today to learn more and get a free quote!
Ready to Add That Finishing Touch?
So, there you have it! Crown molding can really change the look of a room, making it feel more finished and, well, fancy. It’s a project that, when done right, adds a lot of character. If you’re thinking about tackling this yourself, great! But if you’re leaning towards getting it professionally installed, especially if you’re also planning a fresh coat of paint to go with it, remember that The Awesome Painting Services is here in Orlando. We know how important those details are, and we’re happy to help make your home look its absolute best. Give us a call or visit our website at https://theawesomepaintingservices.com to learn more or get a quote. We’re your go-to Orlando painters for making your house painting in Orlando dreams a reality!
Frequently Asked Questions
What kind of crown molding styles are best for my home in Orlando?
Choosing the right crown molding style really depends on your home’s overall look. For older homes in Orlando with lots of character, you might want something more detailed. Newer homes often look great with simpler, cleaner lines. Think about the size of your rooms too; bigger rooms can handle bolder molding. At The Awesome Painting Services, we see how different styles can totally change a room’s feel, and we’re here to help you pick what looks best before we even think about paint!
How do I measure my room for crown molding installation?
Measuring is super important to get right! You’ll want to measure the length of each wall in your room. Don’t forget to subtract any doorways or large windows. It’s always a good idea to measure twice, just to be absolutely sure you have the correct lengths. This helps make sure you buy enough molding and that it fits perfectly, saving you headaches later, especially when it’s time for our Orlando painters to work their magic around it.
What tools do I need to install crown molding?
To install crown molding, you’ll need a few key tools. A good miter saw is essential for cutting those tricky angles. You’ll also need a ladder, a tape measure, a pencil, caulk, nails or screws, and a nail gun or hammer. Having the right gear makes the job much smoother, and ensures a clean edge for The Awesome Painting Services to paint beautifully. If you’re unsure, our house painting in Orlando team can offer advice.
How do you get perfect corners with crown molding?
Getting those corners just right is all about making precise cuts. You’ll typically use a miter saw set to a 45-degree angle to make ‘inside’ and ‘outside’ corner cuts. It takes a bit of practice, but when done correctly, the pieces fit together like puzzle pieces. This clean finish is crucial for a professional look, especially when our interior painting Orlando experts are adding the final touches.
What’s the best way to finish and paint crown molding?
After installing, you’ll want to fill any nail holes and small gaps with caulk or wood filler, then sand it smooth. This prep work is key! Then, you’ll prime the molding for a smooth, even surface. Finally, painting it with a high-quality paint will make it pop. The Awesome Painting Services specializes in making sure your freshly installed molding looks its absolute best with a flawless paint job. We offer expert painting services in Orlando for just this reason!
Can The Awesome Painting Services help with painting my crown molding?
Absolutely! While we don’t install the molding itself, The Awesome Painting Services is your go-to for making your new or existing crown molding look incredible. Our skilled Orlando painters excel at detailed work, ensuring a perfect, seamless interior painting finish that highlights your molding beautifully. We can paint it to match your walls, contrast them, or give it a special accent color. Contact us today for a quote on our seamless interior painting Orlando services!


