Expert Tips for a Flawless Painting House Project
Thinking about a painting house project in Orlando? It’s a big job, but with the right approach, you can get great results. Whether you’re refreshing a room or giving your whole home a new look, planning is key. At The Awesome Painting Services, we know that a successful painting house project means more than just slapping on some color. It’s about preparation, the right supplies, and knowing a few tricks of the trade. Let’s get your home looking its best with some expert tips for your next painting house adventure.
Key Takeaways
- Proper planning is the first step for any successful painting house project, including choosing colors and setting a budget.
- Surface preparation, like cleaning and repairing walls, is vital for a smooth and lasting paint job.
- Understanding basic painting techniques helps achieve professional-looking results, especially for tricky areas like edges and trim.
- For exterior painting house jobs, selecting the right paint and protecting your surroundings are important for durability and appearance.
- Using quality paint and tools significantly impacts the final look and longevity of your painting house project.
Planning Your Painting House Project
Getting ready to paint your house can feel like a big job, but a little planning goes a long way. Thinking things through beforehand saves you headaches and money down the road. It’s not just about picking a color; it’s about making sure the whole process goes smoothly from start to finish.
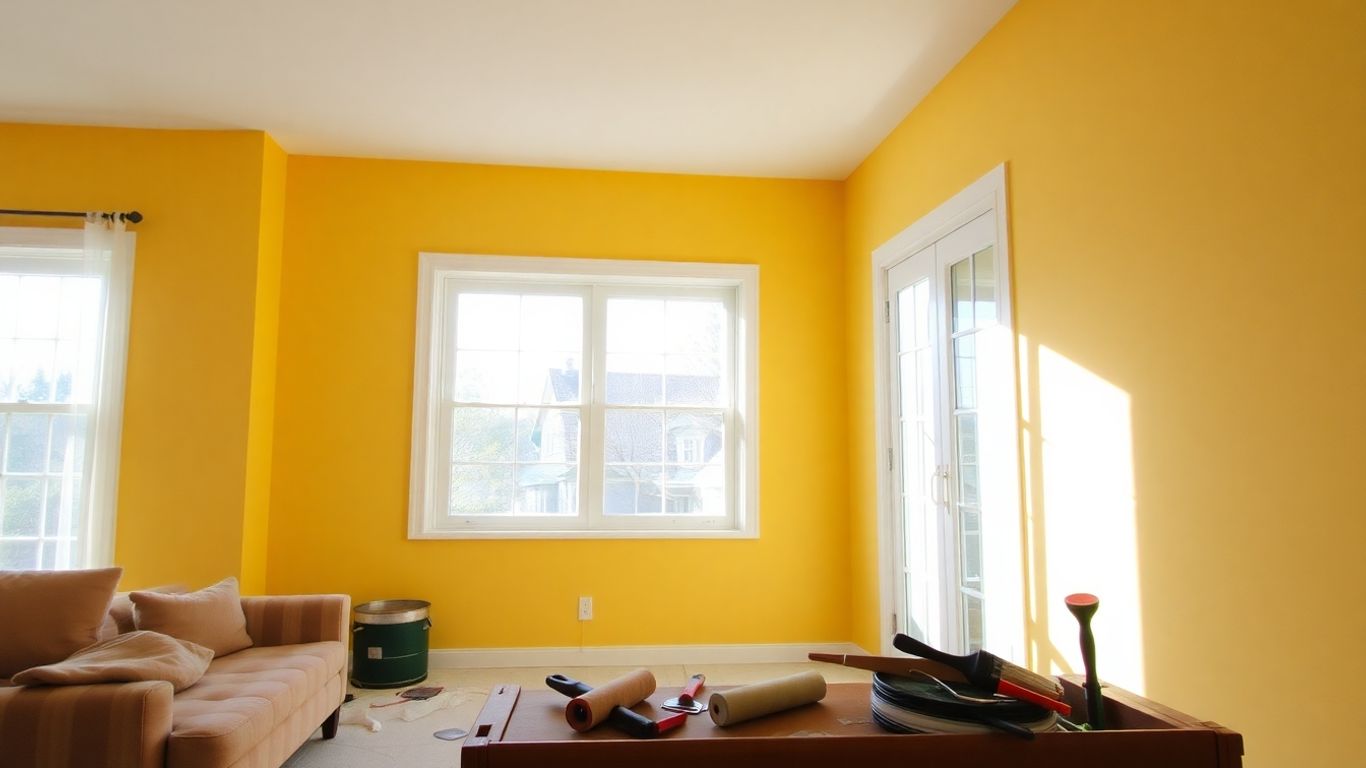
Choosing the Right Colors for Your Home
Picking colors is fun, but it’s also where people can get stuck. Think about the mood you want for each room. Do you want a calm bedroom or a lively kitchen? Look at the light in the room too – natural light can change how a color looks a lot. It’s a good idea to get some paint samples and try them on your walls. Paint a few swatches in different spots and see how they look at different times of the day.
Here are some things to think about:
- Room Size: Lighter colors can make a small room feel bigger, while darker colors can make a large room feel cozier.
- Existing Furniture and Decor: Your paint color should work with what you already have. You don’t want a color that clashes with your sofa or favorite rug.
- Natural Light: Rooms with lots of sun can handle bolder colors, while rooms with less light might need lighter, brighter shades.
- Flow Between Rooms: If rooms are open to each other, consider how the colors will transition. You don’t want jarring changes.
Don’t be afraid to step outside your comfort zone a little, but always have a backup plan. Sometimes the color you love on the swatch doesn’t quite work on the wall.
Gathering Essential Painting Supplies
Having the right tools makes the job so much easier. You don’t want to be halfway through painting a wall and realize you’re out of painter’s tape or your roller cover is falling apart. Make a list and check it twice.
Here’s a basic checklist to get you started:
- Paint (of course!)
- Primer
- Painter’s tape
- Drop cloths or plastic sheeting
- Paint rollers (with extension pole)
- Roller covers (different naps for different surfaces)
- Paint brushes (angled for cutting in, flat for larger areas)
- Paint tray and liners
- Putty knife and spackle for repairs
- Sandpaper (medium and fine grit)
- Cleaning supplies (rags, sponges, bucket, mild soap)
- Ladder or step stool
- Screwdrivers (to remove outlet covers and hardware)
Setting A Realistic Budget For Your Project
Painting can seem straightforward cost-wise, but little things add up. It’s smart to figure out how much you’re willing to spend before you buy anything. This helps you make choices about the type of paint and tools you get.
Consider these cost factors:
- Paint Quality: Higher-quality paint often costs more upfront but can require fewer coats and last longer.
- Number of Colors: Using multiple colors means buying more paint and potentially more supplies.
- Surface Area: The size of the area you’re painting directly impacts how much paint you’ll need.
- Tools and Supplies: Don’t forget to budget for brushes, rollers, tape, drop cloths, and any repair materials.
- Unexpected Costs: It’s always wise to add a little extra for things you might forget or issues that pop up.
A good rule of thumb is to add about 10-15% to your initial estimate for unexpected expenses. This buffer can save you from running out of paint mid-project or having to make a special trip to the store.
Preparing Surfaces For A Flawless Finish
Alright, so you’ve picked out your colors and got your supplies ready. That’s awesome! But before you even think about dipping a brush, we’ve got to talk about what’s underneath the paint. This part is super important, maybe even the most important. A great paint job really starts with a great surface. If you skip this, you’re just asking for trouble down the road, like peeling paint or a bumpy finish that just looks… off.
Cleaning Walls And Ceilings Thoroughly
Seriously, don’t just slap paint over dust and grime. It won’t stick well, and you’ll see every little smudge. Think of it like trying to put a sticker on a dirty window – it just doesn’t work right. You want a clean slate.
- Dusting: Start with a good dusting. Use a soft brush or a vacuum with a brush attachment to get cobwebs and loose dust off walls, ceilings, and trim. Don’t forget corners!
- Washing: For most walls, a simple solution of warm water and a little bit of mild dish soap is perfect. Use a sponge or a soft cloth. For tougher spots, like in a kitchen or bathroom where there might be grease or mildew, you might need a stronger cleaner. Just be sure to rinse really well afterward so no soap residue is left behind.
- Drying: Let everything dry completely before moving on. This might take a few hours, depending on how humid it is.
Repairing Imperfections Before Painting
Once everything is clean and dry, take a close look at your walls and ceilings. You’ll probably find little dings, holes, or cracks that you didn’t notice before. Fixing these now makes a huge difference.
- Holes: Small nail holes can be filled with spackling paste. For bigger holes, you might need a patching compound. Apply it with a putty knife, let it dry, and then sand it smooth.
- Cracks: Hairline cracks can often be filled with paintable caulk. Larger cracks might need joint compound.
- Dings and Scuffs: Lightly sand down any rough edges or raised areas from dents.
After you’ve done your repairs, give the patched areas a light sanding to make them perfectly smooth with the rest of the wall. Wipe away the dust from sanding.
You know, sometimes I think I’m pretty good at DIY, but then I remember that time I tried to patch a hole and ended up making it look like a giant mushroom. It took a few tries and a lot of sanding to get it right. Patience is key here, folks!
Priming For Better Adhesion And Coverage
Primer is like the best friend of your paint. It helps the new paint stick better, covers up old colors or stains, and makes your topcoat look more even. It’s especially important if you’re painting over a dark color with a light one, or if you’ve done a lot of patching.
- When to Prime: Always prime over repaired areas. It’s also a good idea if you’re changing colors drastically, painting over glossy surfaces, or dealing with water stains.
- Types of Primer: There are different kinds, like stain-blocking primers for tough spots and adhesion primers for tricky surfaces. For most general use, a good quality latex primer works well.
- Application: Apply primer just like you would paint – use a roller for large areas and a brush for edges and corners. Let it dry completely according to the product instructions before you start painting.
Mastering Interior Painting Techniques
Alright, so you’ve picked your colors, got your supplies, and prepped those walls. Now comes the fun part: actually painting! It might seem straightforward, but a few tricks can make a big difference between a ‘good enough’ job and a truly professional look. Let’s get into how to make those walls shine.
Cutting In Edges Like A Pro
This is where many DIY painters get a little nervous. Cutting in is all about painting the straight lines where your wall meets the ceiling, corners, trim, or any other surface that won’t be painted the same color. The key is patience and a steady hand.
Here’s a simple way to get clean lines:
- Use the right brush: A good quality angled brush, usually 2 to 2.5 inches, is your best friend here. Look for synthetic bristles for latex paint.
- Load the brush correctly: Dip only about a third of the bristles into the paint. Tap off any excess on the inside of the paint can – don’t wipe it on the rim, as that can pull paint off the brush.
- Paint away from the edge: Start about an inch away from the corner or trim and gently pull the brush towards the edge. This helps prevent drips and allows you to control the amount of paint.
- Work in manageable sections: Don’t try to cut in an entire room at once. Do one wall or even just a section of a wall, then immediately roll the main wall area while the cut-in paint is still wet. This helps blend the edges for a smoother finish.
Don’t rush this step. It’s better to take your time and get it right the first time than to have to go back and touch up messy lines later. A clean edge makes the whole room look tidier.
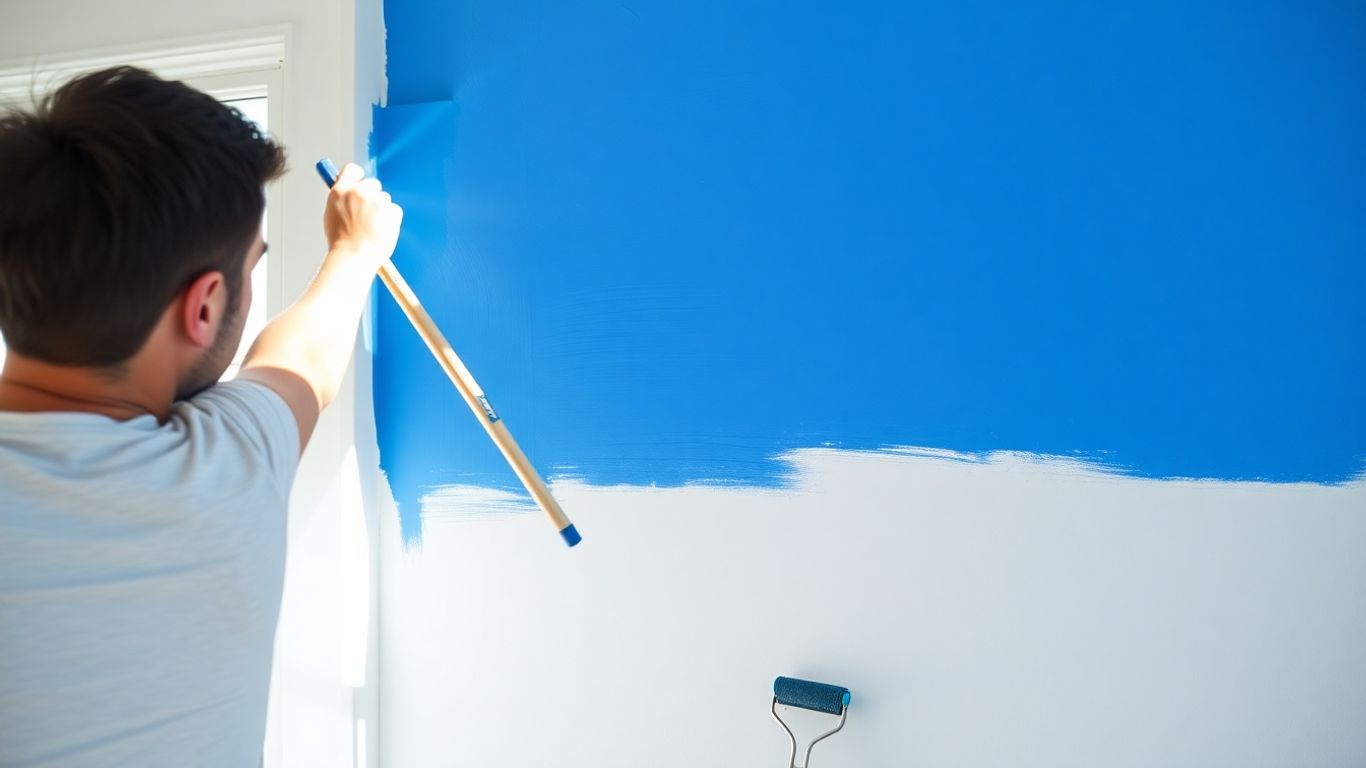
Rolling Walls For Even Coverage
Once your edges are done, it’s time to tackle the big areas. Rolling is how you get that smooth, consistent color across your walls.
- Choose the right roller cover: The "nap" (thickness) of the roller cover matters. For smooth walls, a 3/8-inch nap is usually good. For slightly textured walls, you might need a 1/2-inch or 3/4-inch nap.
- Load the roller evenly: Dip the roller into the paint tray, then roll it back and forth on the ribbed section of the tray to distribute paint evenly. You want the roller to be saturated but not dripping.
- Use a "W" or "M" pattern: Start by applying paint in a "W" or "M" shape on the wall, about 2-3 feet wide. Then, without lifting the roller, go back over that section with parallel, slightly overlapping strokes to spread the paint evenly.
- Maintain a wet edge: Always overlap your previous section by a few inches. This "wet edge" technique prevents lap marks, which are those visible lines where one section of paint dried before the next was applied.
Achieving Smooth Trim And Door Finishes
Trim and doors are like the jewelry of your room, so they deserve special attention. Getting a smooth, professional finish here can really make a difference.
- Prep is key: Make sure trim and doors are clean and any imperfections are filled and sanded smooth. Use painter’s tape to protect adjacent walls, but remove it while the paint is still slightly wet to avoid peeling.
- Use a high-quality brush: Similar to cutting in, a good angled brush is important. For doors, you might also consider a small foam roller for larger flat areas to get a very smooth finish.
- Apply thin, even coats: It’s better to apply two or three thin coats than one thick one. This helps prevent drips and ensures a more durable finish.
- Work with the grain: When painting wood trim or doors, always brush or roll in the direction of the wood grain for the most natural look.
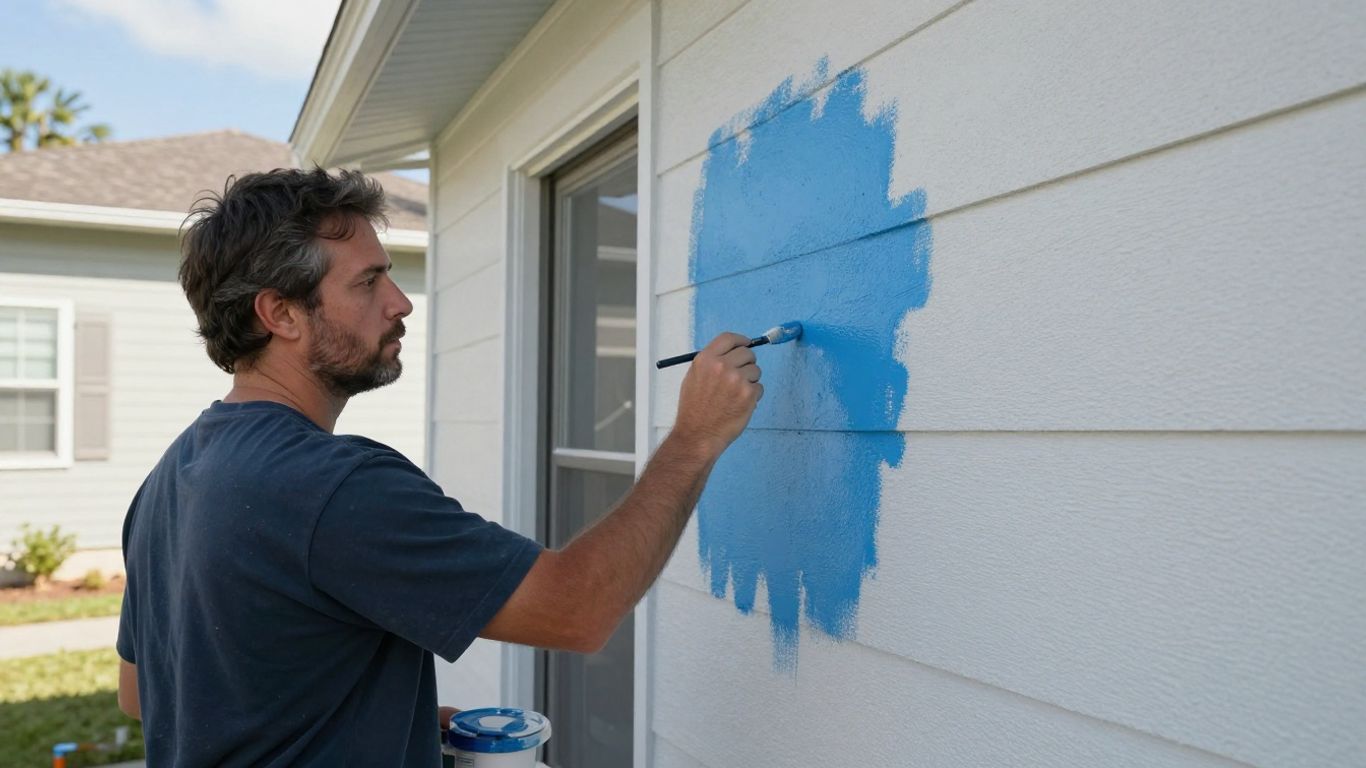
Exterior Painting For Lasting Curb Appeal
Giving your home’s exterior a fresh coat of paint does more than just make it look nice. It’s a shield against the weather, protecting your house from sun, rain, and everything in between. Choosing the right paint and taking your time with the prep work will make a huge difference in how long it lasts and how good it looks.
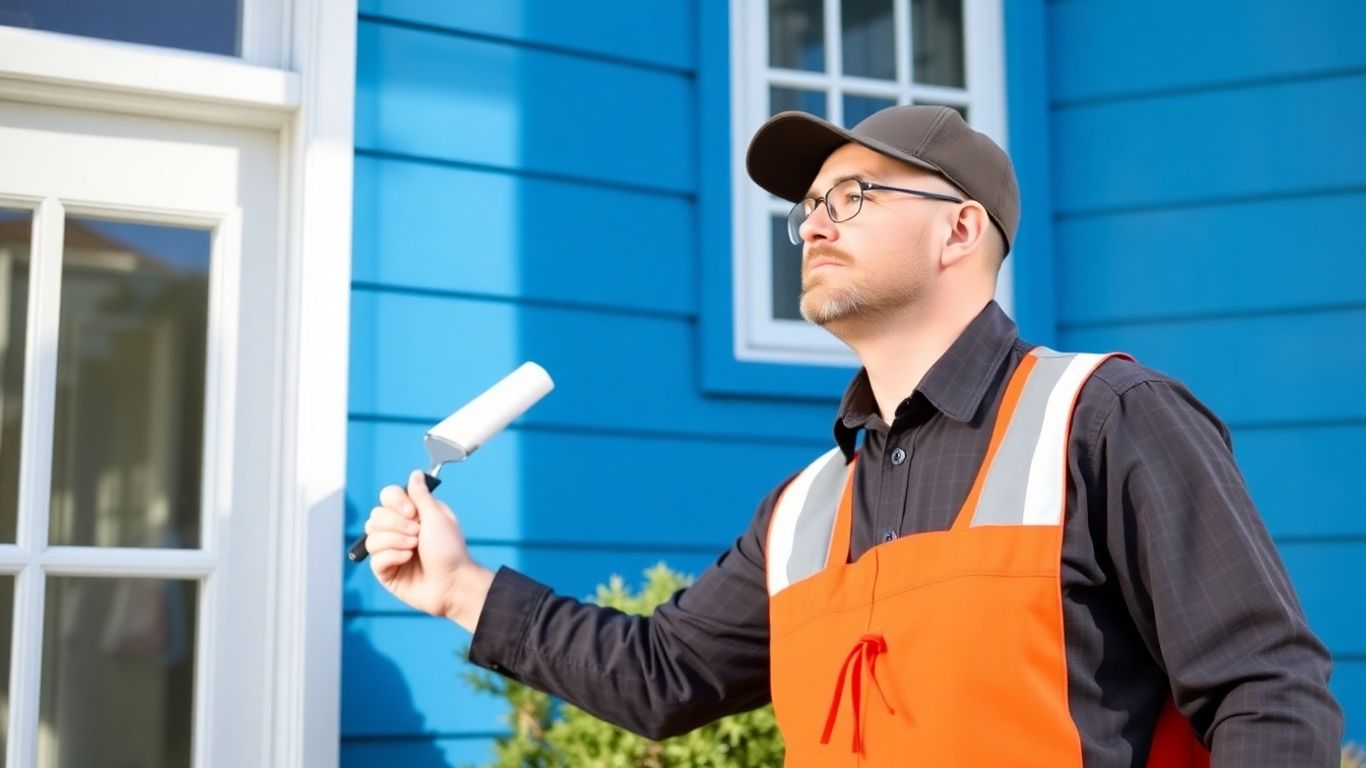
Selecting Durable Exterior Paint
Not all paint is made the same, especially when it comes to what’s going on the outside of your house. You’ll want something that can stand up to the elements. Think about the climate where you live. If you get a lot of sun, you’ll need paint that resists fading. If it rains a lot, you need something that repels water and won’t peel.
Here’s a quick rundown of common exterior paint types:
- Latex (Water-Based): This is the most popular choice these days. It’s flexible, dries fast, and cleans up with soap and water. Great for most siding materials.
- Oil-Based (Alkyd): These used to be the go-to, but they’re less common now. They dry hard and smooth, good for trim and doors, but they take longer to dry and cleanup is a pain.
- Elastomeric: This is a super thick, rubbery paint. It’s fantastic for bridging small cracks and is really waterproof. Good for stucco or masonry.
When you’re looking at paint cans, check the label for things like "100% Acrylic Latex" – that’s usually a good sign of quality and durability. Also, consider the sheen. A satin or semi-gloss finish tends to be more washable and resistant to dirt than a flat finish.
Protecting Your Landscaping During Painting
It’s easy to forget about the plants and flowers when you’re focused on the walls, but they need protection too. Paint drips can really damage your garden. You’ll want to cover up anything you don’t want to get splattered.
Here’s how to keep your greenery safe:
- Use Drop Cloths: Old canvas drop cloths are best because they don’t let paint soak through easily. Plastic sheeting works too, but it can be slippery.
- Plastic Sheeting and Tape: For smaller plants or bushes close to the house, you can carefully wrap them in plastic sheeting and secure it with painter’s tape. Just make sure the tape doesn’t damage the leaves or bark.
- Trim Back Overhanging Branches: If you have bushes or trees with branches hanging right over the area you’re painting, it might be worth trimming them back a bit. This gives you more room to work and less chance of drips.
Remember to remove the coverings as soon as you’re done painting that section, especially if it’s sunny, so plants don’t get too hot.
Applying Paint to Siding and Trim
Painting the siding and trim is where you really see the transformation. It takes patience, but the results are worth it.
Start with the trim. It’s usually easier to paint the trim first, then the siding. This way, if you get a little paint on the siding, it’s not as noticeable as getting siding paint on perfectly done trim.
- Siding: If you’re using a brush, use long, even strokes. If you’re spraying, you’ll need to mask off everything carefully. For most DIYers, brushing or rolling is more practical. Work in sections, and try to maintain a wet edge so you don’t get lap marks.
- Trim: Use a good quality angled brush for sharp lines. Go slow and steady. For windows, paint the sashes first, then the frames. If you’re painting doors, take them off their hinges if you can – it makes getting a smooth finish much easier.
Don’t rush the drying time between coats. The paint needs to cure properly to give you that lasting finish. Check the paint can for recommended drying times, and add a little extra if it’s humid or cool outside.
It might seem like a lot, but taking these steps will make your exterior paint job look professional and last for years to come. It’s a big job, but the curb appeal boost is totally worth the effort.
The Importance Of Quality Paint And Tools
You know, when it comes to painting your house, it’s really easy to think that all paint is pretty much the same, and that any old brush will do the job. But honestly, that’s where a lot of DIY painting projects go wrong. Using good quality paint and the right tools makes a huge difference, not just in how the finished job looks, but also in how easy it is to get there. It might cost a little more upfront, but trust me, it saves you headaches and often, money in the long run.
Understanding Different Paint Finishes
Paint finishes, or sheens, affect how the paint looks and how it holds up. They range from super shiny to completely flat. Here’s a quick rundown:
- High-Gloss: Very shiny, super durable, and easy to clean. Great for trim, doors, and cabinets, but shows every little bump and imperfection on the wall.
- Semi-Gloss: Still shiny, but less so than high-gloss. Good for kitchens, bathrooms, and trim. It’s washable and resists moisture well.
- Satin/Eggshell: These are the most popular for walls. They have a soft sheen, are fairly washable, and hide imperfections better than glossier finishes. Eggshell is usually a bit flatter than satin.
- Matte/Flat: No shine at all. These are great for hiding wall flaws and give a soft, velvety look. However, they’re the hardest to clean and can scuff easily.
Choosing the right finish is about balancing looks with practicality. Think about where the paint is going and how much wear and tear it will get. A flat finish might look nice in a low-traffic living room, but you’ll probably want something more washable in a busy hallway.
Investing In Professional Brushes And Rollers
Don’t skimp on your brushes and rollers! Cheap ones shed bristles everywhere, leave streaks, and just make the whole process harder. A good quality brush, usually made with synthetic or natural bristles depending on the paint type, will apply paint smoothly and evenly. For rollers, look for ones with a dense nap that matches your wall texture. A thicker nap is better for rougher walls, while a smoother nap works for smooth surfaces.
Here’s a little table to help you pick:
| Surface Type | Recommended Roller Nap | Brush Type (for cutting in) |
|---|---|---|
| Smooth Walls | 1/4" – 3/8" | Synthetic Bristles |
| Light Texture | 1/2" | Synthetic or Natural |
| Heavy Texture | 3/4" – 1" | Natural Bristles (for oil) |
Why High-Quality Paint Makes A Difference
When you buy better paint, you’re usually getting:
- Better Coverage: High-quality paints often cover surfaces in fewer coats. This means you use less paint and save time.
- Durability: They tend to be more resistant to fading, chipping, and staining, meaning your paint job will look good for longer.
- Easier Application: Good paint flows better, levels out nicely, and is generally less messy to work with. This makes cutting in and rolling much smoother.
- Color Accuracy: Premium paints often have more pigment, leading to richer, truer colors that match what you see on the swatch.
It’s tempting to grab the cheapest can, but think of it as an investment in your home. A good paint job, done with good materials, just looks better and lasts longer. It’s worth the extra effort to pick out the right stuff.
Ensuring A Safe And Efficient Painting Process
Painting your house can be a big job, and doing it right means thinking about safety and how to get it done without taking forever. It’s not just about slapping paint on the walls; there’s a bit more to it.
Setting Up Your Workspace Safely
Before you even open a can of paint, take a moment to get your area ready. This makes everything go smoother and keeps you from tripping or having accidents. A well-organized space is a safe space.
- Clear the Room: Move furniture away from the walls or cover it completely with drop cloths. The less clutter, the easier it is to move around.
- Protect Floors: Use sturdy drop cloths or plastic sheeting to cover carpets and hard floors. Tape them down at the edges so they don’t shift.
- Secure Ladders: Make sure any ladders you use are on a stable, level surface. If you’re painting a high ceiling, consider a scaffold for better stability.
- Keep Kids and Pets Away: Designate the painting area as off-limits while you’re working and until the paint is dry.
Ventilation Tips For Interior Painting
Good airflow is super important when you’re painting inside. Paint fumes can be strong, and you don’t want to feel lightheaded or sick.
- Open windows and doors to create a cross-breeze. Even a little bit of fresh air makes a big difference.
- Use fans to help circulate air out of the room. Pointing a fan towards an open window can help pull the fumes outside.
- If you’re painting a whole room or using a lot of paint, consider an air purifier with a carbon filter.
Proper ventilation helps the paint dry faster too, which means you can get back to using your room sooner. It also helps prevent that lingering paint smell that can stick around for days.
Efficient Techniques For Faster Completion
Want to get this project done without it dragging on? A few smart moves can speed things up.
- Have Everything Ready: Before you start, make sure you have all your supplies, including paint, brushes, rollers, tape, and drop cloths. Running out mid-job is a time killer.
- Work in Sections: Tackle one wall or one area at a time. This helps you stay focused and makes the job feel less overwhelming. You can find some great tips on how to approach different surfaces when you look for a professional painting company.
- Use the Right Tools: Good quality brushes and rollers don’t just give a better finish; they also apply paint more quickly and evenly.
- Don’t Overwork the Paint: Apply thin, even coats. Trying to cover everything in one super-thick layer often leads to drips and uneven drying, which means more touch-ups later.
Thinking about these things upfront can save you a lot of hassle and make your painting project much more enjoyable. It’s all about being prepared and working smart.
Making sure your painting job is safe and goes smoothly is super important. We take care to protect your home and belongings while we work, so you don’t have to worry. Our team uses the best methods to get a great finish that lasts. Want to see how we can make your space look amazing? Visit our website to learn more about our painting services and get a free quote today!
Ready to Make Your Orlando Home Shine?
So, there you have it! Tackling a house painting project can seem like a lot, but with a little planning and the right approach, you can get amazing results. Whether you’re thinking about a fresh coat for your living room or a whole new look for your home’s exterior, remember that quality matters. If you’re in Orlando and dreaming of a perfect paint job without the hassle, The Awesome Painting Services is here to help. We love making homes in our community look their best. Feel free to explore our website at https://theawesomepaintingservices.com to see what we can do, or just give us a call. We’re happy to answer any questions and provide a quote for your house painting in Orlando needs. Let’s get your home looking awesome!
Frequently Asked Questions
How do I pick the best colors for my house painting project in Orlando?
Choosing colors can be fun! Think about the mood you want to create. Light colors make rooms feel bigger, while darker shades can make them feel cozier. It’s also smart to consider the colors of your furniture and the natural light in your home. For expert advice tailored to Orlando’s sunny climate and unique home styles, The Awesome Painting Services is here to help you find the perfect shades. Visit us at https://theawesomepaintingservices.com to see our color gallery or request a consultation!
What are the most important supplies needed for house painting?
You’ll definitely need good quality paint, brushes, rollers, and painter’s tape. Don’t forget drop cloths to protect your floors and furniture, a sturdy ladder, and cleaning supplies for prepping the walls. Having the right tools makes a huge difference in how your project turns out. If you’re looking for top-notch painting services in Orlando, The Awesome Painting Services uses only the best materials to ensure a beautiful, lasting finish.
Why is preparing the walls so important before painting?
Think of it like getting ready for a big event. You want everything to look its best! Properly cleaning, fixing any holes or cracks, and using a primer helps the new paint stick better and look smoother. Skipping this step can lead to bumpy paint or colors that don’t look quite right. For a truly flawless interior painting job in Orlando, proper prep is key, and The Awesome Painting Services excels at it.
How can I get clean lines when painting edges and corners?
This is called ‘cutting in.’ Using a good angled brush and steady hand is crucial. You want to load your brush with just enough paint and use smooth, deliberate strokes along the edge where the wall meets the ceiling or trim. Taking your time here makes a big impact on the final look. Our Orlando painters at The Awesome Painting Services are masters at achieving crisp, clean lines every time.
What’s the difference between interior and exterior house paint?
Exterior paint is made to withstand weather like sun, rain, and temperature changes, so it’s tougher and lasts longer outdoors. Interior paint is designed for looks and is usually washable, but it’s not built for the elements. Using the right type of paint for each job is essential for a beautiful and durable finish. The Awesome Painting Services offers expert house painting in Orlando for both the inside and outside of your home.
How long does a typical house painting project take?
The time it takes really depends on the size of your home, how much prep work is needed, and whether it’s interior or exterior painting. A small room might take a day or two, while a whole house can take several days or even weeks. Factors like weather can also affect exterior jobs. For an efficient and professional painting experience in Orlando, contact The Awesome Painting Services for a personalized estimate at https://theawesomepaintingservices.com.